
>>

Tiny pockets of warm apple pie filling wrapped in a crisp oatmeal cookie shell—perfect for parties, make-ahead treats, or a cozy night in.
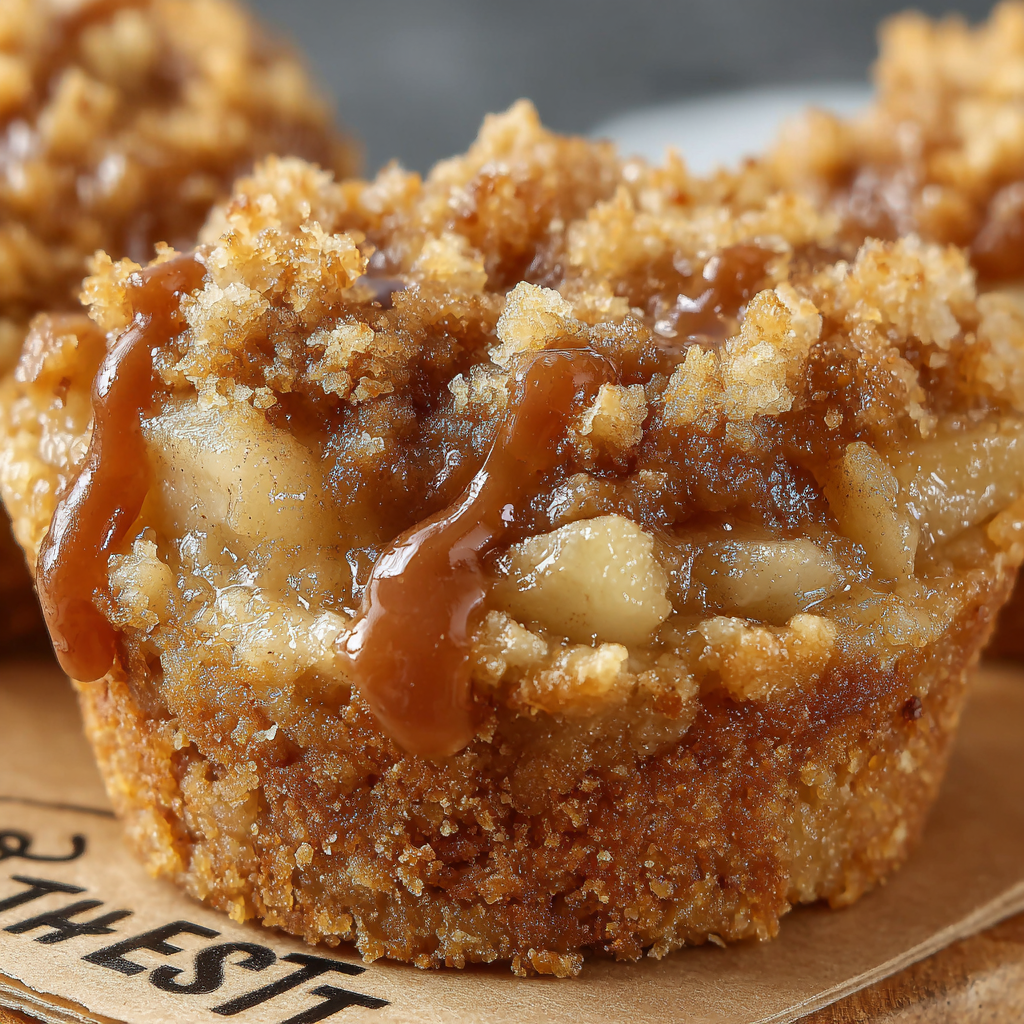
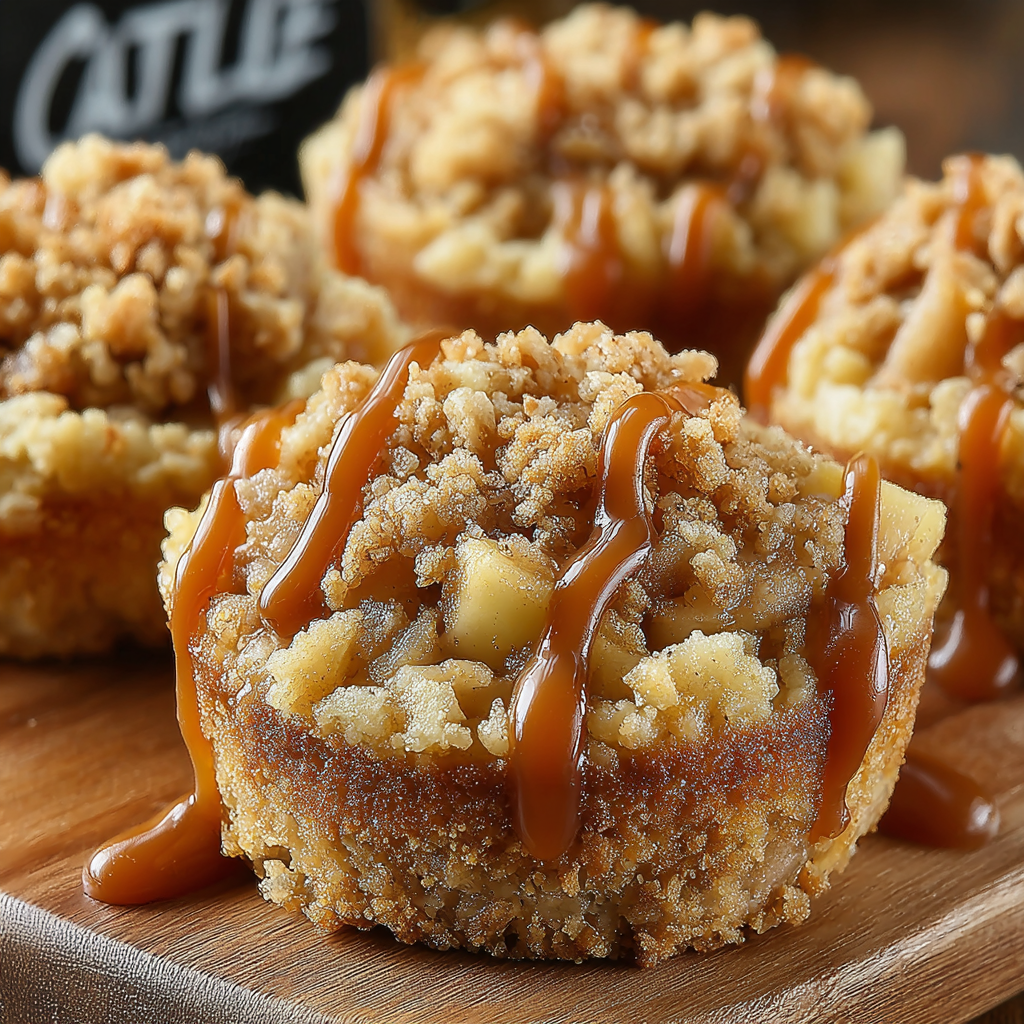
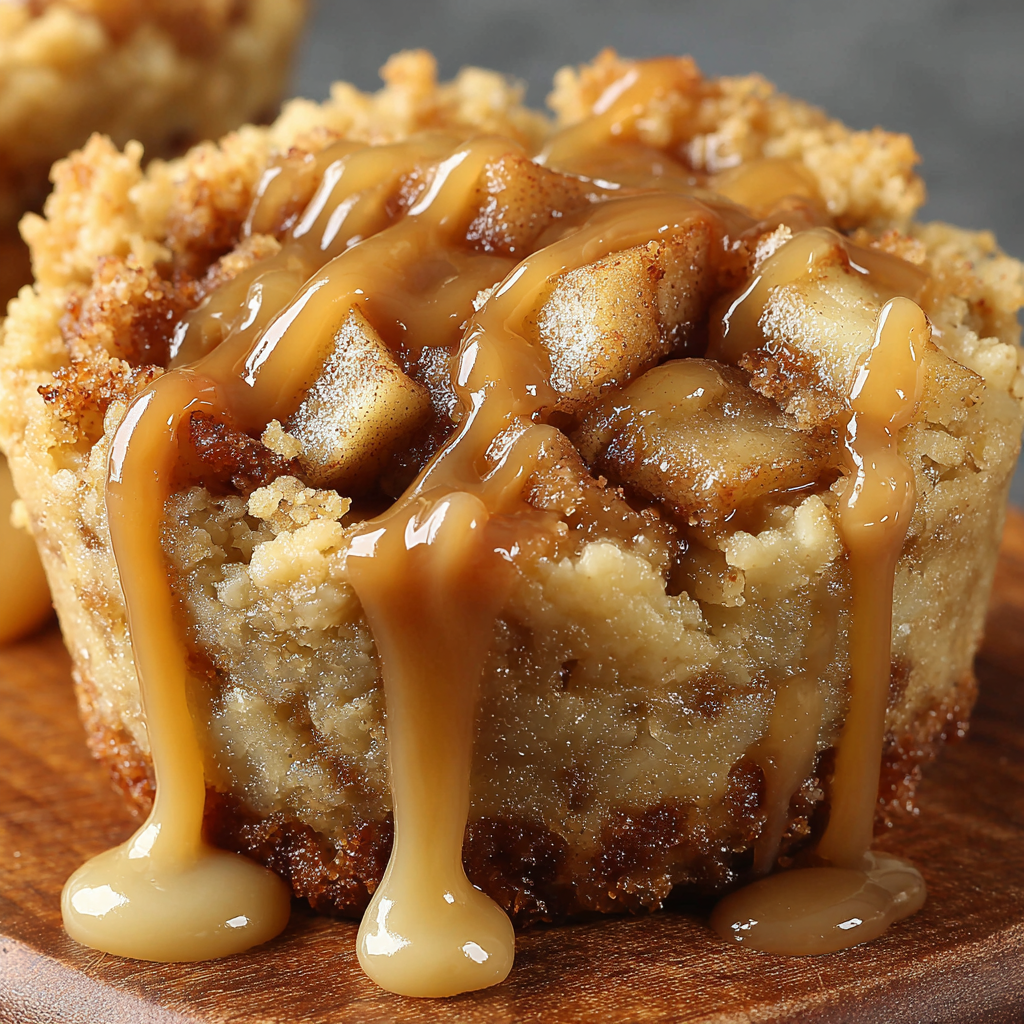
This recipe for Apple Crisp Bites is a little bite of heaven: a crisp baked oatmeal cookie crust on the outside and soft, warmly spiced apple pie filling on the inside. I first made these on a busy holiday afternoon when I wanted something handheld and festive; they disappeared so fast that I started keeping the mini muffin tin within reach during apple season. The contrast between the crunchy oat exterior and the tender apple center is exactly what makes these so memorable—there's a buttery oat aroma, a caramelized brown sugar sweetness, and the bright, cozy warmth of cinnamon and nutmeg.
They come together quickly: about 25 minutes of active prep and roughly 15 minutes in the oven, so you can have 24 mini bites on the table in about 40 minutes. I love serving them warm with a drizzle of caramel or a tiny dollop of whipped cream when guests arrive. Over the years I have tweaked the filling and the oat crust for the best balance of texture and flavor: smaller apple dice for quicker softening, and slightly more oats in the crust so the cups hold up when filled and baked. These are equally at home at a potluck, a holiday dessert spread, or a weekend afternoon with coffee.
In my kitchen these have become a crowd-pleaser: family members who aren’t typically dessert people will grab two. I once brought a tray to a book club and the bites sparked a conversation about best apple varieties—Granny Smith lovers and Honeycrisp fans both approved. They’re simple enough to make with kids helping press the crust into the tin, which is how many of my favorite memories with this recipe started.
My favorite thing about these bites is how they invite conversation: guests will ask whether you made the filling from scratch and often guess the spices. I’ve sent frozen trays to neighbors during apple season, and they always say the reheated bites taste like they were just baked. The simplicity and portability are what keep me making them year after year.
Store cooled bites in a single layer or separated by parchment in an airtight container in the refrigerator for up to 4 days. For longer storage, lay them on a baking sheet and freeze until firm, then transfer to a resealable freezer bag for up to 3 months. To reheat, place frozen bites on a baking sheet at 325 degrees F for 8–12 minutes until heated through; fresh-baked ones rewarm in 5–7 minutes. Avoid microwave reheating for long periods as it will soften the crust; a brief zap is fine but yields a less crisp exterior.
If you prefer a nuttier crust, substitute up to 1/3 cup of the flour with finely ground almonds or almond meal—this will change texture and moisture, so reduce butter slightly by 1 tablespoon if the mixture seems oily. For a gluten-free version, use a 1-to-1 gluten-free flour blend and certified gluten-free rolled oats. Swap brown sugar for coconut sugar for a slightly earthier sweetness, or use maple syrup (reduce butter by 1 tablespoon) for a deeper flavor; be aware liquid swaps change the crumb and bake time slightly. For vegan options, replace butter with a firm plant-based butter and canned apple filling for convenience.
Serve warm with a drizzle of caramel, a small scoop of vanilla ice cream, or a dollop of lightly sweetened whipped cream. For a brunch table, pair the bites with coffee, hot cider, or a small cheese plate—the sweet-tart apple pairs well with sharp cheeses like aged cheddar. Garnish with a tiny pinch of flaky sea salt over caramel-draped bites to elevate the flavors and balance sweetness. These also work beautifully on dessert platters alongside mini tarts and cookies.
The idea of a crisp or crumble topping has roots in British and American home cooking—simple fruit baked with a butter-sugar-oat topping became popular in the 19th and 20th centuries as a frugal and comforting alternative to pies. These miniature versions combine that tradition with cookie-making techniques: the textured oatmeal cup recalls a tart shell while delivering the same warm, spiced apple profile found in classic American desserts. Bite-sized desserts like these reflect modern entertaining trends—small, shareable, and portable.
In autumn, choose firmer, tangy apples like Granny Smith or a mix to balance sugar, and add a pinch of ground cloves for extra warmth. In winter, stir in a tablespoon of bourbon or maple syrup into the filling for deeper flavor. For spring and summer, switch the filling to diced peaches or berries with a lighter sugar level and a squeeze of lemon, and reduce cornstarch slightly if the fruit is very juicy. Holiday versions can include chopped toasted pecans in the topping for crunch.
To save time, prepare the apple filling up to 3 days ahead and refrigerate; assemble and bake on the day you plan to serve. Pre-measure the dry crust mix and keep chilled butter cut into small pieces ready to cut in. If doubling the batch, bake on two pans and rotate them in the oven for even heat. Label frozen trays with date and contents so you can easily grab a treat on busy days or warm up a few for unexpected guests.
These Apple Crisp Bites are a small labor of love that rewards you with big flavor and plenty of compliments. Make a double batch to freeze, share with neighbors, or bring to your next gathering—there’s comfort and joy in every bite.
Use firm apples like Honeycrisp or Fuji for a balance of sweet and tart; dice them into 1/4-inch pieces for even cooking.
Press the oat crust evenly into the mini muffin tin using the back of a spoon to ensure uniform thickness and even baking.
Cool bites in the tin for 10 minutes before unmolding to maintain shape; run a thin knife around each cup if needed.
Freeze baked bites flat on a sheet tray before transferring to a bag to prevent sticking and preserve texture.
If using canned filling, drain excess syrup to prevent soggy crusts and sprinkle a bit of cornstarch into very runny filling.
This nourishing apple crisp bites recipe is sure to be a staple in your kitchen. Enjoy every moist, high protein slice — it is perfect for breakfast or as a wholesome snack any time.
This Apple Crisp Bites recipe makes perfectly juicy, tender, and flavorful steak every time! Serve with potatoes and a side salad for an unforgettable dinner in under 30 minutes.
Preheat oven to 350 degrees F and grease a 24-cup mini muffin tin well so the bites release easily after baking.
Melt 2 tablespoons butter in a medium saucepan over medium-high heat. Add diced apples, 1/3 cup brown sugar, 1 teaspoon cinnamon, 1/8 teaspoon nutmeg and 3 tablespoons water. Cook 4–6 minutes until apples are slightly softened.
Combine 1 tablespoon plus 1 teaspoon cornstarch with 2 tablespoons cold water, stir until smooth, then add to the apple pan. Cook and stir 4–5 minutes until the mixture is thick and apples are tender. Remove from heat and cool slightly.
In a large bowl combine 1 cup flour, 1 cup rolled oats and 3/4 cup brown sugar. Cut in 12 tablespoons softened butter with a pastry cutter until the mixture resembles coarse crumbs.
Place a heaping tablespoon of the crust mixture into each mini muffin cup and press along the bottom and up the sides to form a cup. Add about 1 tablespoon of apple filling to each cup and sprinkle about 1 teaspoon of reserved crumb mixture on top.
Bake at 350 degrees F for 15–20 minutes until the tops are golden brown. Cool in the pan for 10 minutes, then run a knife around the edges and pop the bites out. Drizzle with caramel if desired.
Last Step: Please leave a rating and comment letting us know how you liked this recipe! This helps our business to thrive and continue providing free, high-quality recipes for you.
Leave a comment & rating below or tag
@silksavor on social media!

Tender baked salmon crowned with a garlicky Parmesan herb crust, bright lemon, and buttery crunch. Simple to make, stunning to serve, and irresistibly flavorful.

Buttery graham crust, silky cheesecake, and cinnamon-kissed apples under a crunchy crumb, finished with glossy caramel. A fall crowd-pleaser you will crave.

Tender green beans in silky mushroom cream, crowned with crispy onions. A comforting holiday side made entirely from scratch that always disappears fast.
Leave a comment & rating below or tag @silksavor on social media!
Enjoyed this recipe? Share it with friends and family, and don't forget to leave a review!
This recipe looks amazing! Can't wait to try it.
Comments are stored locally in your browser. Server comments are displayed alongside your local comments.

Join to receive our email series which contains a round-up of some of our quick and easy family favorite recipes.
