
>>

Crispy, golden cheese crisps ready in 10 minutes — a simple, customizable snack made with shredded cheddar and a pinch of garlic. Perfect for parties or quick cravings.
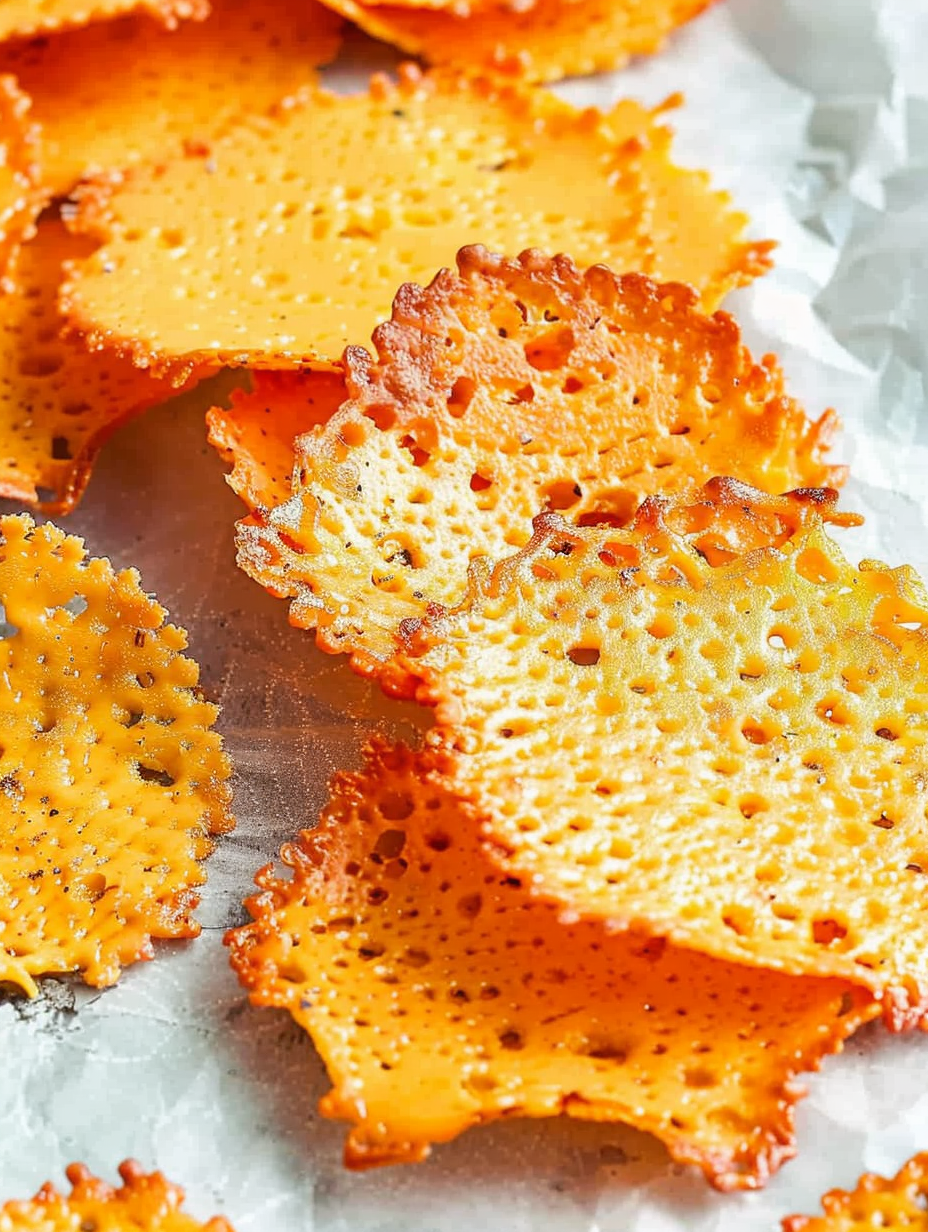
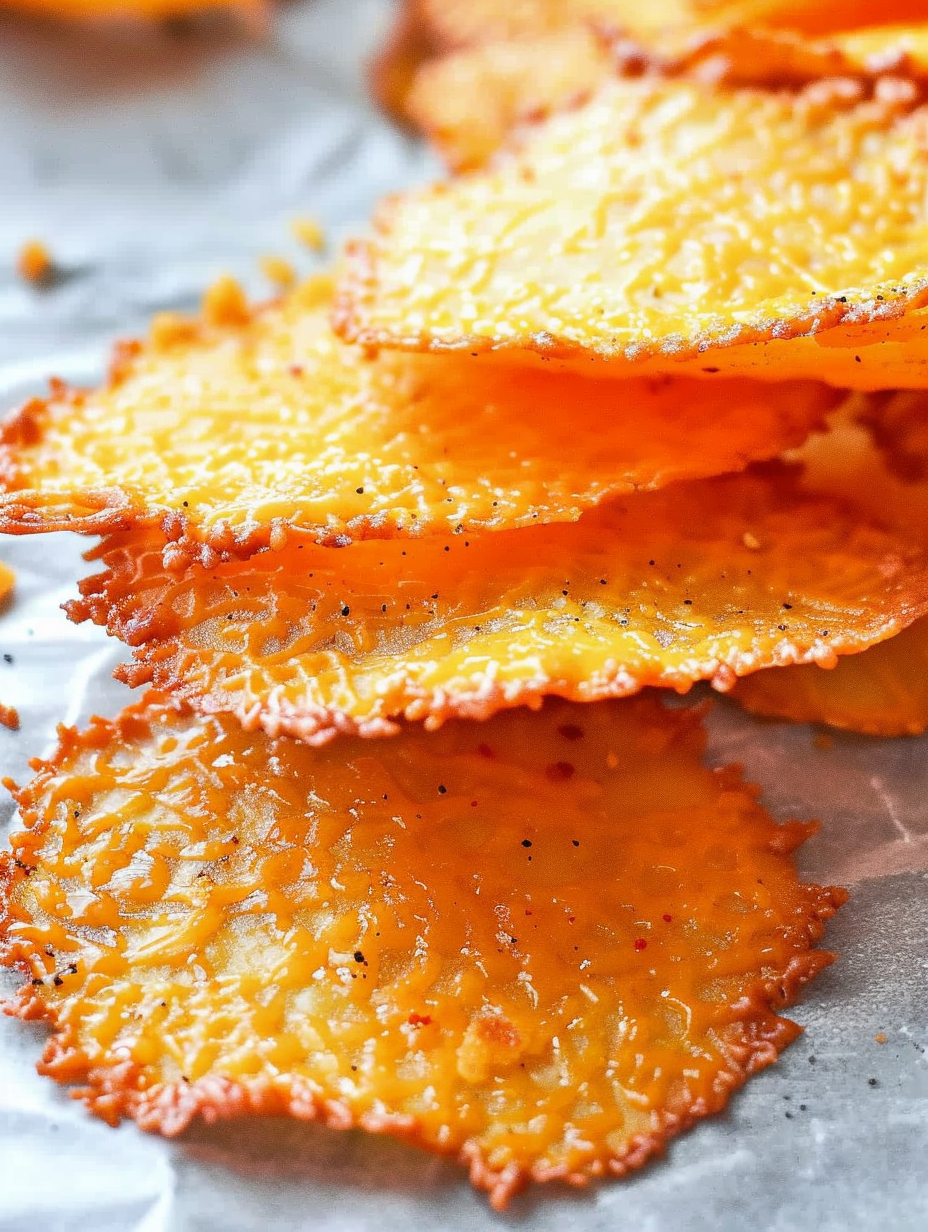
This simple baked cheese crisps recipe has become my go-to snack when I need something salty, crunchy, and utterly satisfying in under 10 minutes. I first discovered the technique during a hectic week when I wanted something crunchy to serve with soup but had no crackers in the pantry. A single cup of shredded cheddar transformed into dozens of crunchy rounds in minutes, and the family could not stop reaching for them. The texture is pure delight: the edges blister and turn deep golden while the center remains slightly lacy, delivering a crisp that shatters on the first bite.
I love that this snack is customizable and forgiving. You can make it plain, dress it up with spices, or use different hard cheeses depending on what you have. The recipe is also wonderfully inexpensive and requires minimal equipment. It’s one of those discoveries that felt like cheating the first time — melted cheese becomes a crisp — and now it’s a permanent feature in my snack rotation for game nights, impromptu guests, or evening television grazing. The garlic powder adds a warm, savory note that lifts the cheddar without overwhelming it.
I first served these at a small Sunday brunch and my friend brought them as her new obsession. They disappeared quickly, and I loved how a tiny change in timing — a minute longer in the oven — produced a dramatically different crunch. Watching the cheese bubble and then flatten into golden discs is oddly satisfying. My kids call them crunchy coins, and they are always excited when I make them.
My favorite aspect of these crisps is how adaptable they are. I once doubled the recipe for a holiday party and added smoked paprika to half the batch and everything bagel seasoning to the other half. Guests loved the variety and the fact that there was no fuss. The crisps became conversation starters and disappeared faster than anything else on the table. They are small pleasures that elevate simple gatherings.
Store cooled crisps in an airtight container in the refrigerator to preserve their texture. Layer parchment paper between stacks to prevent sticking and condensation. For longer storage, freeze in single layers on a tray until firm, then transfer to a freezer-safe bag with parchment between layers. Reheat frozen or softened crisps on a baking sheet at 300 degrees Fahrenheit for 1 to 2 minutes to restore crispness. Avoid storing at room temperature for extended periods, especially in humid climates, as that will promote sogginess.
If cheddar is not on hand, use Parmesan, Asiago, or pecorino for a saltier, nuttier crisp. For a spicier option, choose pepper jack or add a pinch of cayenne to the garlic powder. If you want dairy-free alternatives, try thin slices of baked halloumi for a similar texture, although results vary. When substituting, keep volume similar: 1 tablespoon of a hard grated cheese per crisp works best. Avoid very moist cheeses like fresh mozzarella which will not crisp properly.

Serve as a crunchy garnish for soups and salads, or present them on a platter with a variety of dips such as herbed sour cream, olive tapenade, or tomato chutney. They pair exceptionally well with simple roasted vegetables or a charcuterie board featuring cured meats and olives. For a fun appetizer, top crisps with a small dollop of crema and a sliver of smoked salmon or roast pepper. Garnish with a micro herb or small sprig of thyme for an elegant touch.
The idea of transforming cheese into a crust or crisp is common in Italian and French kitchens where aged cheeses get grated and baked or pan-fried to create lacy tuile-like wafers. This baked crisp variation leans into American convenience and ingredient availability, celebrating cheddar as a widely loved cheese in the United States. Crisped cheese has roots in traditional cooking practices where cooks sought to add texture and concentrated flavor to dishes with minimal ingredients.
In winter, amplify warmth with smoked paprika and a touch of cayenne. For spring and summer, add lemon zest and a sprinkle of fresh chopped chives after baking for brightness. Around the holidays, mix in a pinch of nutmeg and rosemary for a festive note, or top with a candied walnut and a small smear of fig jam for a sweet-salty balance. These small swaps make the crisps suitable for seasonal menus and special occasions.
If you like to meal prep, bake a large sheet of crisps and store them layered with parchment in an airtight container in the refrigerator. Portion into small snack bags for grab-and-go treats. Because they maintain quality refrigerated, you can prepare multiple batches on the weekend and enjoy them throughout the week. For best texture when snacking later, briefly reheat for 30 to 60 seconds under a broiler on low or in a 300 degrees Fahrenheit oven.
These simple rounds are proof that minimal ingredients can produce maximum satisfaction. Make them your own, and enjoy the happy crunch that makes small moments feel special.
Remove excess grease while crisps cool by dabbing with a paper towel to keep them crunchy.
Watch the oven closely between 5 and 8 minutes; remove once edges turn golden brown.
Use freshly shredded cheese for the most reliable crisp texture and even browning.
Space 1 tablespoon mounds about 2 inches apart to allow for spreading without merging.
This nourishing baked cheese crisps recipe is sure to be a staple in your kitchen. Enjoy every moist, high protein slice — it is perfect for breakfast or as a wholesome snack any time.
This Baked Cheese Crisps recipe makes perfectly juicy, tender, and flavorful steak every time! Serve with potatoes and a side salad for an unforgettable dinner in under 30 minutes.
Preheat the oven to 350 degrees Fahrenheit and position the rack in the center to ensure even heat distribution.
Line a baking sheet with parchment paper. Use a tablespoon to drop 1 tablespoon mounds of shredded cheddar about 2 inches apart so they have room to spread.
Sprinkle each mound with a light pinch of garlic powder. Distribute about 2 teaspoons across the entire batch for a balanced flavor.
Bake for 5 to 8 minutes, watching closely from minute five. Remove when the edges are golden brown and the centers have a lacy texture.
Lift the parchment to a cooling rack so crisps cool flat. Dab tops with a paper towel to remove excess grease if desired to maintain crispness.
Once cool, store crisps in an airtight container layered with parchment in the refrigerator. Recrisp in a 300 degrees Fahrenheit oven for 1 to 2 minutes if softened.
Last Step: Please leave a rating and comment letting us know how you liked this recipe! This helps our business to thrive and continue providing free, high-quality recipes for you.
Leave a comment & rating below or tag
@silksavor on social media!

Tender baked salmon crowned with a garlicky Parmesan herb crust, bright lemon, and buttery crunch. Simple to make, stunning to serve, and irresistibly flavorful.

Buttery graham crust, silky cheesecake, and cinnamon-kissed apples under a crunchy crumb, finished with glossy caramel. A fall crowd-pleaser you will crave.

Tender green beans in silky mushroom cream, crowned with crispy onions. A comforting holiday side made entirely from scratch that always disappears fast.
Leave a comment & rating below or tag @silksavor on social media!
Enjoyed this recipe? Share it with friends and family, and don't forget to leave a review!
This recipe looks amazing! Can't wait to try it.
Comments are stored locally in your browser. Server comments are displayed alongside your local comments.

Join to receive our email series which contains a round-up of some of our quick and easy family favorite recipes.
