
>>

Bake a nostalgic tray of tender chocolate cakes sandwiched with fluffy marshmallow-vanilla filling. These whoopie pies are crowd-pleasing, freezer-friendly, and perfect for special occasions.
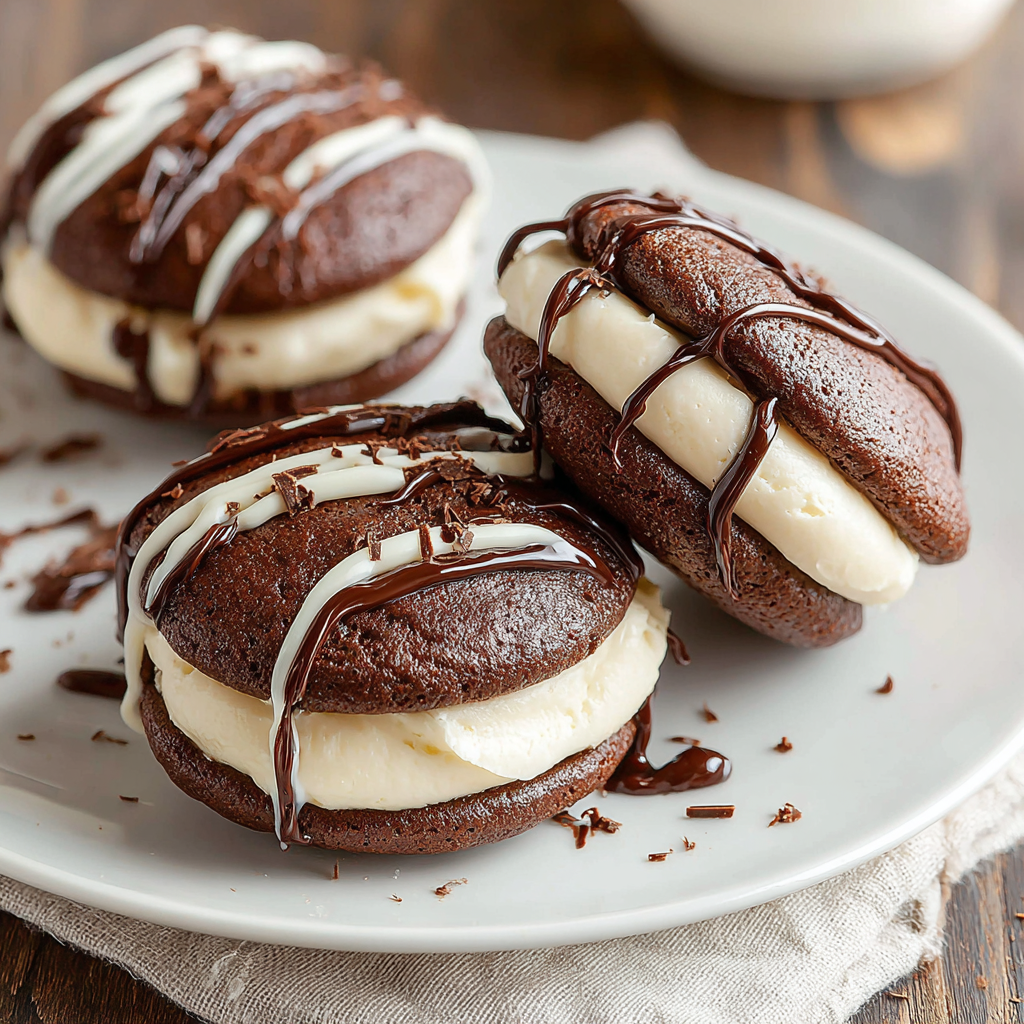
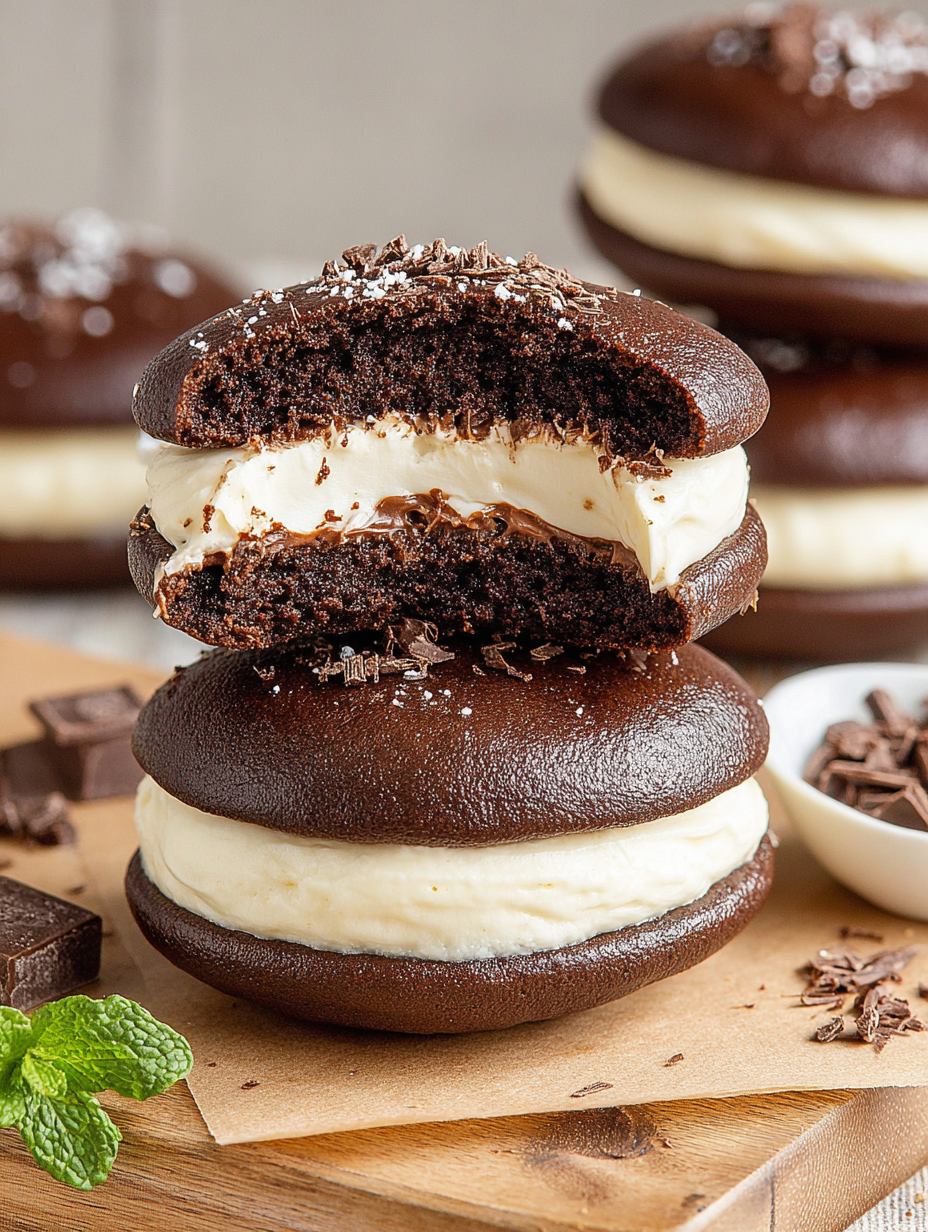
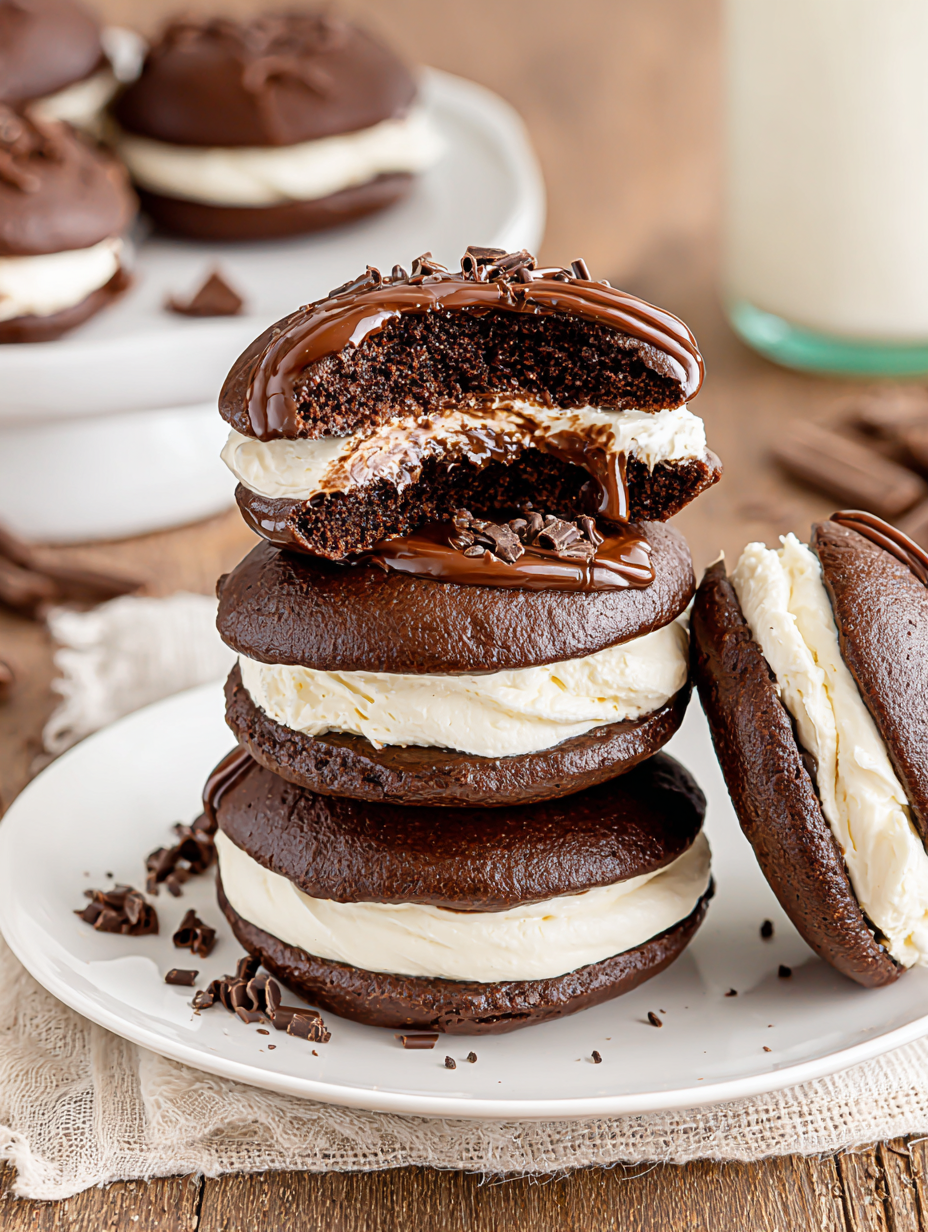
This recipe has been my go-to for celebrations, bake sales, and rainy afternoon baking experiments. I first learned to make these chocolate sandwich treats at my grandmother's kitchen table, where the counter was always dusted with flour and the radio played soft country tunes. One bite is pure nostalgia: a pillowy, cake-like cookie with a cloud of creamy, marshmallow-forward filling. The texture is what makes these stand out — soft, tender cakes that give slightly under your teeth, meeting a silky sweet center that melts across the tongue.
I discovered the exact balance of ingredients during a weekend where I was determined to replicate the best bakery whoopie I had ever tasted. A combination of cake flour, Dutch-process cocoa, and a touch of malted milk powder produced that bakery crumb: delicate but not fragile. The filling pairs butter, shortening, and marshmallow fluff for structure and taste, and a hint of salt lifts the sweetness, making each sandwich irresistible. Over years of testing, I learned timing, scoop sizes, and the little flourishes that keep the crumb tender and the filling stable — and I love sharing those tricks with friends and family.
My family always asks for these when someone graduates or when the weather turns chilly. The first time I brought a batch to a neighborhood potluck, the tray returned almost empty — people kept sneaking them between conversations. Baking them feels like gifting a small moment of joy.
My favorite aspect is how forgiving these are — even imperfectly rounded cakes sandwich into charming, rustic treats. The first time I dipped them in chocolate and added rainbow sprinkles, my kids declared them party pies and requested them for birthdays ever since. Baking them brings back those warm family afternoons where the kitchen smelled like cocoa and everyone lingered to share a fresh whoopie.
Store cooled, unfilled cakes in an airtight container lined with parchment for up to 3 days at room temperature, or refrigerate the filling for up to 5 days. For longer storage, freeze cooled cakes or assembled sandwiches in a single layer on a sheet pan until firm, then transfer to a freezer bag for up to 3 months. Thaw overnight in the refrigerator, or at room temperature for 30 minutes before serving. If dipped in chocolate, keep refrigerated to preserve the coating and remove 15 minutes before serving to soften slightly.
If you need to swap ingredients, use full-fat plain yogurt thinned with a tablespoon of milk for buttermilk in a pinch. Replace butter-flavored shortening in the filling with an equal amount of vegetable shortening for stability, or use all butter for flavor but expect a softer filling. Omit espresso powder for a pure chocolate profile; it simply enhances depth. For a gluten-free version, sub a cup-for-cup gluten-free flour blend and add a teaspoon of xanthan gum to mimic the cake flour structure.
Serve these as a dessert plate with a dusting of powdered sugar or a drizzle of warm ganache. Pair with cold milk, coffee, or a scoop of vanilla ice cream for a diner-style treat. For parties, display on a tiered stand and label varieties if you make both dipped and plain versions. Garnish with finely grated dark chocolate or toasted marshmallow crumbs for a gourmet touch.
Whoopie pies have New England roots and are often associated with Maine and Pennsylvania Dutch traditions. Historically, they were packed into lunch pails and celebrated as portable comforts. Each region developed its own spin — from the classic chocolate-and-cream to pumpkin or ginger variations. The nostalgic name and handheld format made them a beloved American confection passed through generations.
In autumn, fold pumpkin puree and warm spices into the cake batter and swap the marshmallow center for a cinnamon buttercream. For winter holidays, dip assembled pies in peppermint-infused chocolate and top with crushed candy canes. Spring and summer benefit from lighter finishes: use white chocolate and lemon zest or sandwich with a strawberry buttercream for a brighter flavor profile.
For efficient batch baking, make the cakes ahead and freeze them unfilled. Prepare the filling on the morning of serving and assemble an hour before your event to let the flavors meld. Use labeled containers and stack with parchment squares between layers to prevent sticking. For transport, place in single layers in shallow boxes with bubble wrap edges to keep sandwiches from shifting.
These whoopie pies are a little bit nostalgic and a lot of fun to make. Whether you’re baking for a crowd or treating yourself, the combination of tender chocolate and fluffy marshmallow-vanilla filling is timeless. Try a small test batch first to dial in scoop size and bake time for your oven, then scale up — your friends will thank you.
Use room-temperature ingredients for even mixing and a smoother batter.
Let the batter rest 15 minutes before scooping to hydrate the flour and improve texture.
Chill the scoop or wet your finger when smoothing peaks to keep shapes uniform.
This nourishing best whoopie pie recipe recipe is sure to be a staple in your kitchen. Enjoy every moist, high protein slice — it is perfect for breakfast or as a wholesome snack any time.
This Best Whoopie Pie Recipe recipe makes perfectly juicy, tender, and flavorful steak every time! Serve with potatoes and a side salad for an unforgettable dinner in under 30 minutes.
In a stand mixer, beat 1 cup packed light brown sugar with 1/2 cup room-temperature salted butter, 1 tablespoon vanilla bean paste, 1 teaspoon coffee extract, and 1/2 teaspoon salt on medium-high for 4 minutes, scraping the bowl halfway through.
Beat in 1 large room-temperature egg for 1 minute until fully incorporated and smooth, scraping the sides to ensure even mixing.
Whisk together 2 1/4 cups cake flour, 1/2 cup Dutch-process cocoa, 2 tbsp malted milk powder, 2 tsp black cocoa, 1 tsp baking powder, 1/2 tsp baking soda, and 1/2 tsp espresso powder in a separate bowl.
Add dry ingredients to the mixer in three parts, alternating with 1 cup room-temperature buttermilk, beginning and ending with dry. Mix until just combined, avoiding overmixing.
Fold batter with a rubber spatula and let it rest for 15 minutes to hydrate the flour and improve texture.
Preheat oven to 350°F. Scoop batter with a #40 scoop onto parchment-lined half-sheet pans, spacing 3 inches apart. Smooth peaks with a wet finger and bake 9 to 11 minutes until tops spring back.
Cool cakes on the pan 5 to 10 minutes, then transfer to a wire rack to cool completely before filling to avoid melting the filling.
Cream 1 cup cold cubed unsalted butter with 1/2 cup butter-flavored shortening, 1 tbsp vanilla bean paste, and 1/2 tsp salt. Add 4 cups powdered sugar and 2 oz heavy cream gradually, then fold in 1 1/4 cups marshmallow fluff.
Scoop filling onto half the cakes and sandwich with remaining cakes. Optionally dip halfway in melted wafers and add sprinkles while chocolate is wet.
Last Step: Please leave a rating and comment letting us know how you liked this recipe! This helps our business to thrive and continue providing free, high-quality recipes for you.
Leave a comment & rating below or tag
@silksavor on social media!

Tender baked salmon crowned with a garlicky Parmesan herb crust, bright lemon, and buttery crunch. Simple to make, stunning to serve, and irresistibly flavorful.

Buttery graham crust, silky cheesecake, and cinnamon-kissed apples under a crunchy crumb, finished with glossy caramel. A fall crowd-pleaser you will crave.

Tender green beans in silky mushroom cream, crowned with crispy onions. A comforting holiday side made entirely from scratch that always disappears fast.
Leave a comment & rating below or tag @silksavor on social media!
Enjoyed this recipe? Share it with friends and family, and don't forget to leave a review!
This recipe looks amazing! Can't wait to try it.
Comments are stored locally in your browser. Server comments are displayed alongside your local comments.

Join to receive our email series which contains a round-up of some of our quick and easy family favorite recipes.
