
>>

Soft, chewy oatmeal bars layered with molten caramel and chocolate — an easy one-bowl, no-mixer treat for serious caramel lovers.
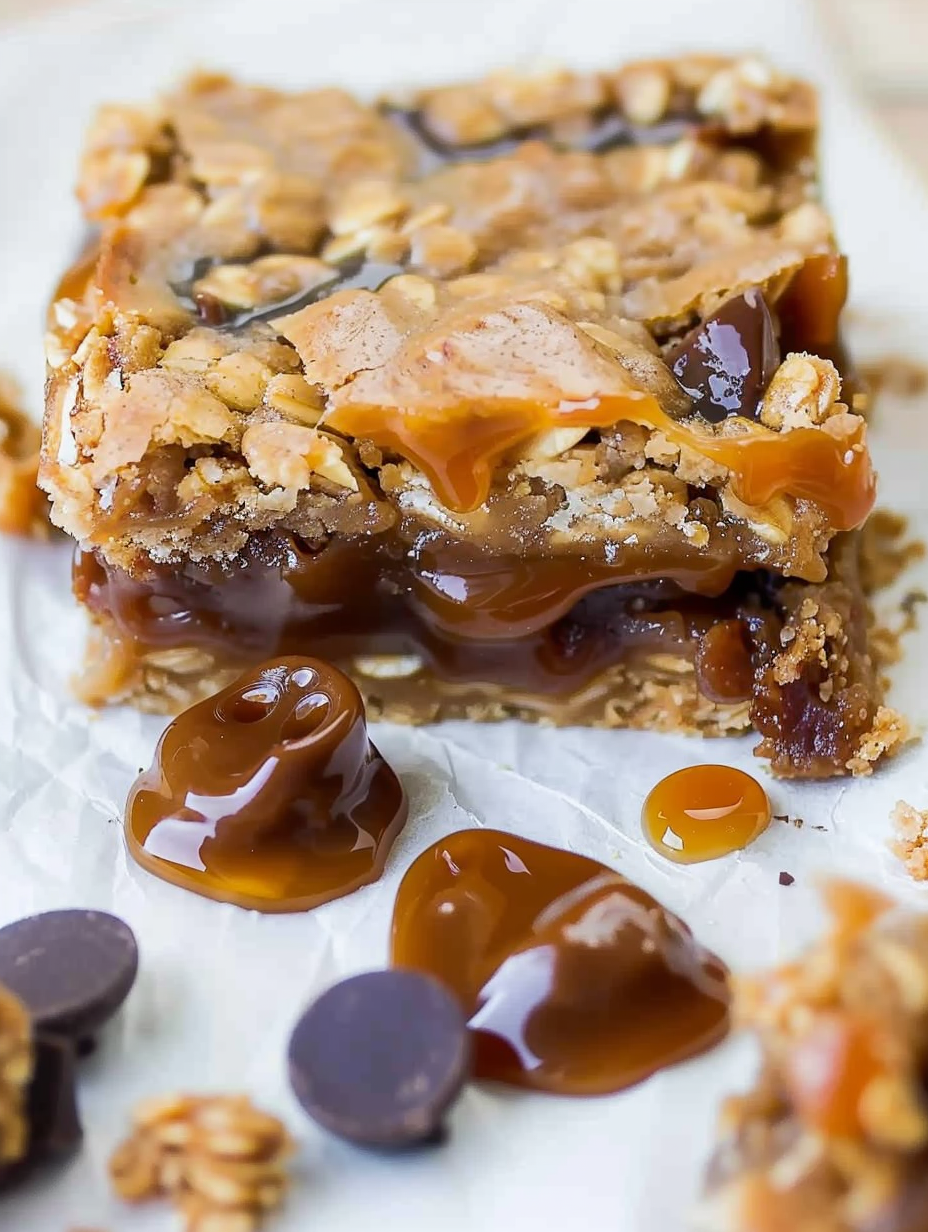
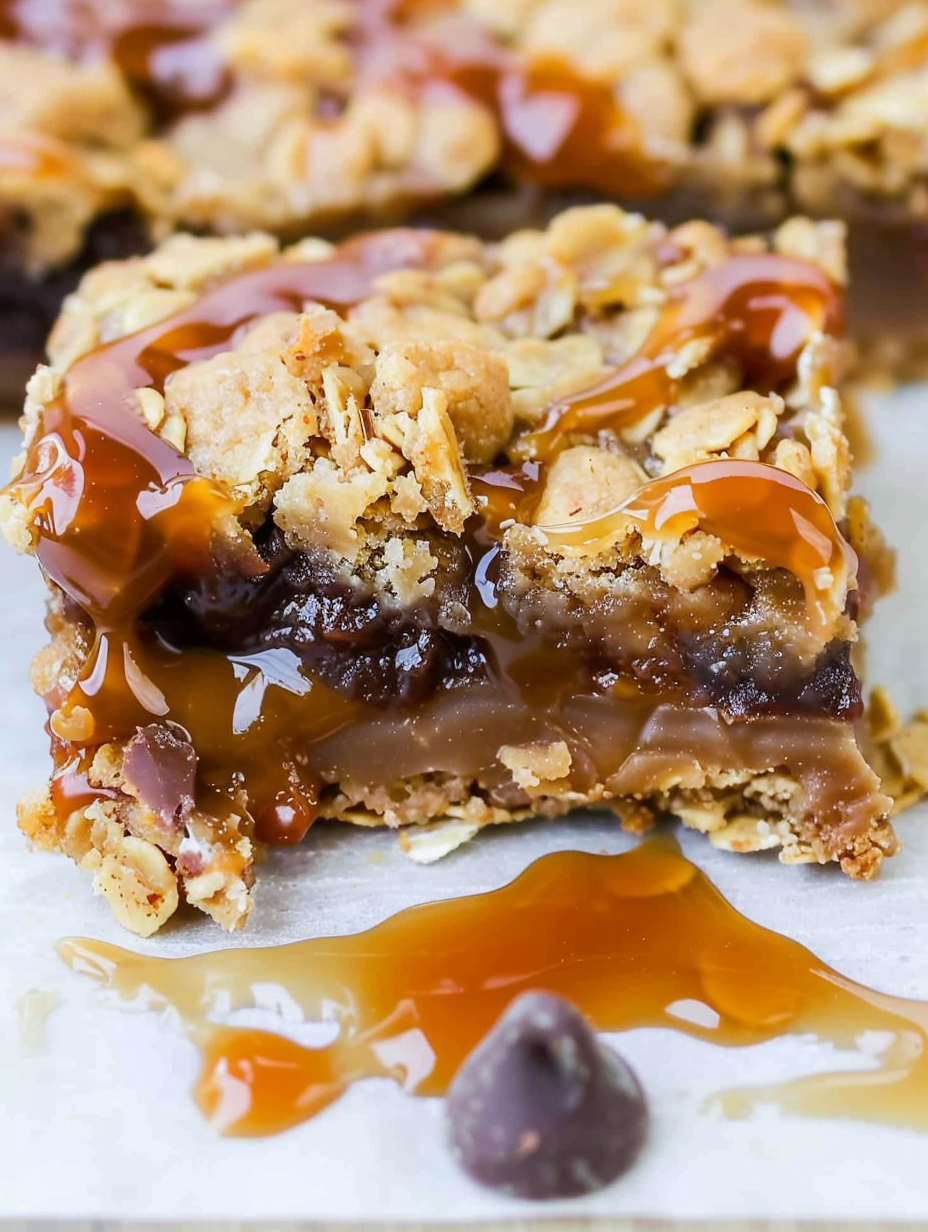
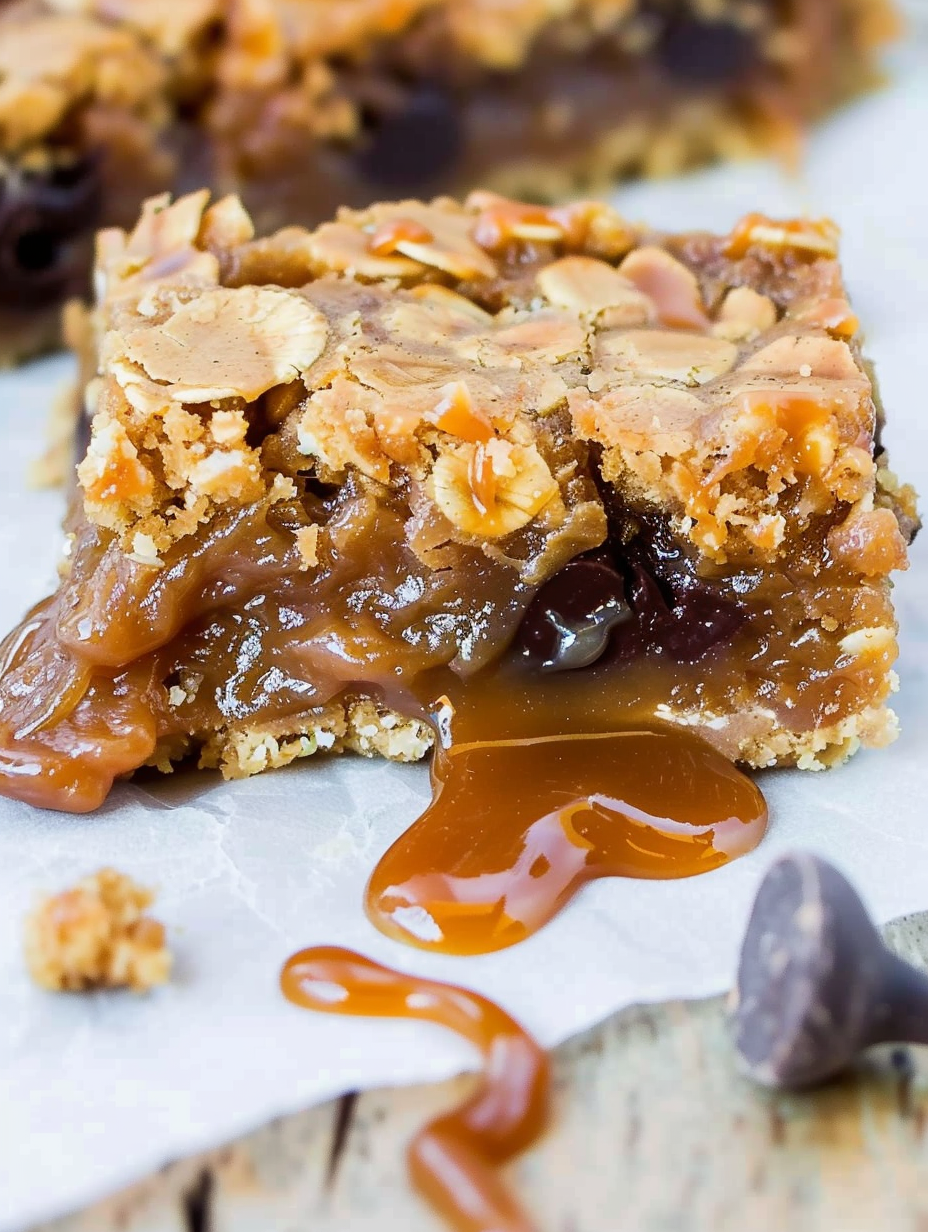
This recipe is for the serious caramel lover: a pan of soft, chewy bars built from an oat-brown-sugar base, a molten caramel layer, and a scattering of chocolate that melts and melds into a dreamy middle. I first stumbled on this combination during a holiday baking marathon when I had a bag of soft caramels sitting on the counter and an open bag of oats in the pantry. The result was so gooey and addictive that it became a household favorite. The butter-to-oat ratio makes the base tender and slightly sandy, while the caramel layer gives the bars that signature pull and richness that everyone raves about.
What makes these bars special is their texture contrast: a slightly crisp, golden edge, a chewy oat crust, and a molten, sticky center that firms to sliceable perfection if you allow enough cooling time. I use Werther's Originals Soft Caramels because they melt luxuriously and give consistent results, but I include alternatives below. These require only one bowl and no mixer — perfect when you want an impressive dessert without fuss. Share them at potlucks, bake sales, or keep them wrapped in the freezer for an indulgent weeknight pick-me-up.
On the first time I made these, my partner declared them the best caramel bars he'd ever had, and a neighbor who tried one went back for a second before I could even box them up. They travel well and are forgiving: even if the caramel looks a little runny straight from the oven, a patient cooling time produces clean slices.
My favorite thing about these is how forgiving they are: even a slightly overbaked edge adds crunch while the center remains gooey, and substituting chocolate types yields delightful variations. We almost always double the batch at holiday time because friends request them the moment they appear.
Store cooled bars in an airtight container at room temperature for up to 1 week. To prevent sticking, layer parchment between pieces or keep them in a single layer. For longer storage, wrap individual bars tightly in plastic wrap and place them in a freezer-safe bag for up to 4 months; thaw at room temperature or briefly warm in the microwave for 6–8 seconds to soften. If refrigerating to speed up setting, cover loosely with foil to avoid sogginess from condensation and allow a few minutes at room temperature before slicing for cleaner cuts.
If you can't find soft caramel squares, use Caramel Bits or Kraft caramels; you may need a few more pieces if the candies are smaller. For a dairy-free alternative, use vegan caramel confections and substitute full-fat coconut cream for heavy cream — expect a subtle coconut note. Oats can be swapped for gluten-free certified rolled oats if you need a gluten-free version, but be sure to also use gluten-free labeled flour. For a less sweet profile, use dark chocolate chips (60–70% cacao) instead of semi-sweet.
Cut into 16 squares for dessert portions, or smaller 2-inch bites for parties. Serve with a dollop of lightly sweetened whipped cream or a scoop of vanilla ice cream to counterbalance the richness. These pair beautifully with a robust coffee or a black tea. For a festive platter, drizzle melted white chocolate over the cooled bars and sprinkle flaky sea salt or toasted pecans for contrast.
Bars like these are a classic American bake — blending techniques from oat-based cookies and layer bars that became popular in mid-century home baking. The name and concept are close relatives of the millionaires' shortbread and other caramel-chocolate layered sweets. Over time, bakers adapted these bars to include oats for texture and heartier flavor, turning them into a portable, crowd-pleasing treat found at bake sales and family gatherings.
In fall, stir 1/2 teaspoon ground cinnamon and 1/4 teaspoon nutmeg into the oat base for a warm spice profile; top with chopped toasted pecans. For summer gatherings, swap semi-sweet chocolate for chopped milk chocolate and add a sprinkle of toasted coconut on top. During the holidays, fold 1/3 cup chopped crystallized ginger into the reserved crumble for a zingy counterpoint to the caramel.
Make them ahead: bake, cool completely, and freeze in individual portions for quick desserts during the week. Assemble through the par-bake step and store the par-baked base in the fridge for up to 24 hours — when ready, melt the caramel, assemble, and finish baking. Label and date your frozen portions and rotate older items forward; a shallow pan with straight sides (8x8) fits neatly in most refrigerators and frees up counter space during assembly.
Readers have told me these are the bars they bring to every potluck; one friend reported they vanished within minutes at a family reunion. I once shipped a batch to a college student during finals week — the caramel squares survived travel (well-wrapped) and were devoured immediately upon arrival. Simple praise: when guests ask for the recipe, you know you've nailed it.
These bars reward a little patience and pay it back in rich, nostalgic bites. Try them as written first, then adapt by swapping your favorite chocolate or adding nuts — they always spark smiles and second helpings.
Line the pan with foil and spray it; it makes removing sticky bars effortless and simplifies cleanup.
If the caramel thickens while melting, warm it gently in 15-second microwave bursts and stir between each burst.
Allow bars to cool fully before slicing; refrigerating to speed up setting is fine but may slightly firm the caramel.
Use old-fashioned rolled oats, not quick oats, to preserve chewy texture.
This nourishing carmelitas — chewy oatmeal caramel bars recipe is sure to be a staple in your kitchen. Enjoy every moist, high protein slice — it is perfect for breakfast or as a wholesome snack any time.
This Carmelitas — Chewy Oatmeal Caramel Bars recipe makes perfectly juicy, tender, and flavorful steak every time! Serve with potatoes and a side salad for an unforgettable dinner in under 30 minutes.
Preheat oven to 350°F. Line an 8x8-inch pan with aluminum foil and spray with cooking spray for easy removal and cleanup.
In a large microwave-safe bowl, melt 3/4 cup butter (about 90 seconds). Whisk in 3/4 cup packed light brown sugar and 1 tablespoon vanilla until smooth.
Add 1 cup all-purpose flour, 1 cup old-fashioned rolled oats, 1 teaspoon baking soda, and 1/2 teaspoon salt. Stir until combined; mixture will be thick and somewhat crumbly.
Press half the oat mixture into the prepared pan to form an even layer and bake for 10 minutes to set the base and create a firmer surface for the caramel.
Combine approximately 35 unwrapped soft caramels and 1/2 cup heavy cream in a microwave-safe bowl. Heat in 60-second bursts, stirring between bursts, until smooth (about 4–5 minutes). Alternatively, melt gently in a saucepan over medium-low heat, stirring constantly.
Sprinkle 1 cup chocolate chips evenly over the baked base. Slowly pour the warm caramel sauce over the chocolate so it melts and spreads. Crumble the remaining oat mixture over the top evenly.
Return the pan to the oven and bake about 15–18 minutes until edges are lightly browned and the center bubbles lightly. Remove and cool.
Cool completely in the pan for up to 4 hours at room temperature, or refrigerate (covered) to set faster. Once firm, lift out using foil and slice into 16 bars.
Last Step: Please leave a rating and comment letting us know how you liked this recipe! This helps our business to thrive and continue providing free, high-quality recipes for you.
Leave a comment & rating below or tag
@silksavor on social media!

Tender baked salmon crowned with a garlicky Parmesan herb crust, bright lemon, and buttery crunch. Simple to make, stunning to serve, and irresistibly flavorful.

Buttery graham crust, silky cheesecake, and cinnamon-kissed apples under a crunchy crumb, finished with glossy caramel. A fall crowd-pleaser you will crave.

Tender green beans in silky mushroom cream, crowned with crispy onions. A comforting holiday side made entirely from scratch that always disappears fast.
Leave a comment & rating below or tag @silksavor on social media!
Enjoyed this recipe? Share it with friends and family, and don't forget to leave a review!
This recipe looks amazing! Can't wait to try it.
Comments are stored locally in your browser. Server comments are displayed alongside your local comments.

Join to receive our email series which contains a round-up of some of our quick and easy family favorite recipes.
