
>>

Sweet blondie base studded with juicy cherries and semi-sweet chocolate chips — a dependable, crowd-pleasing bar that comes together fast.
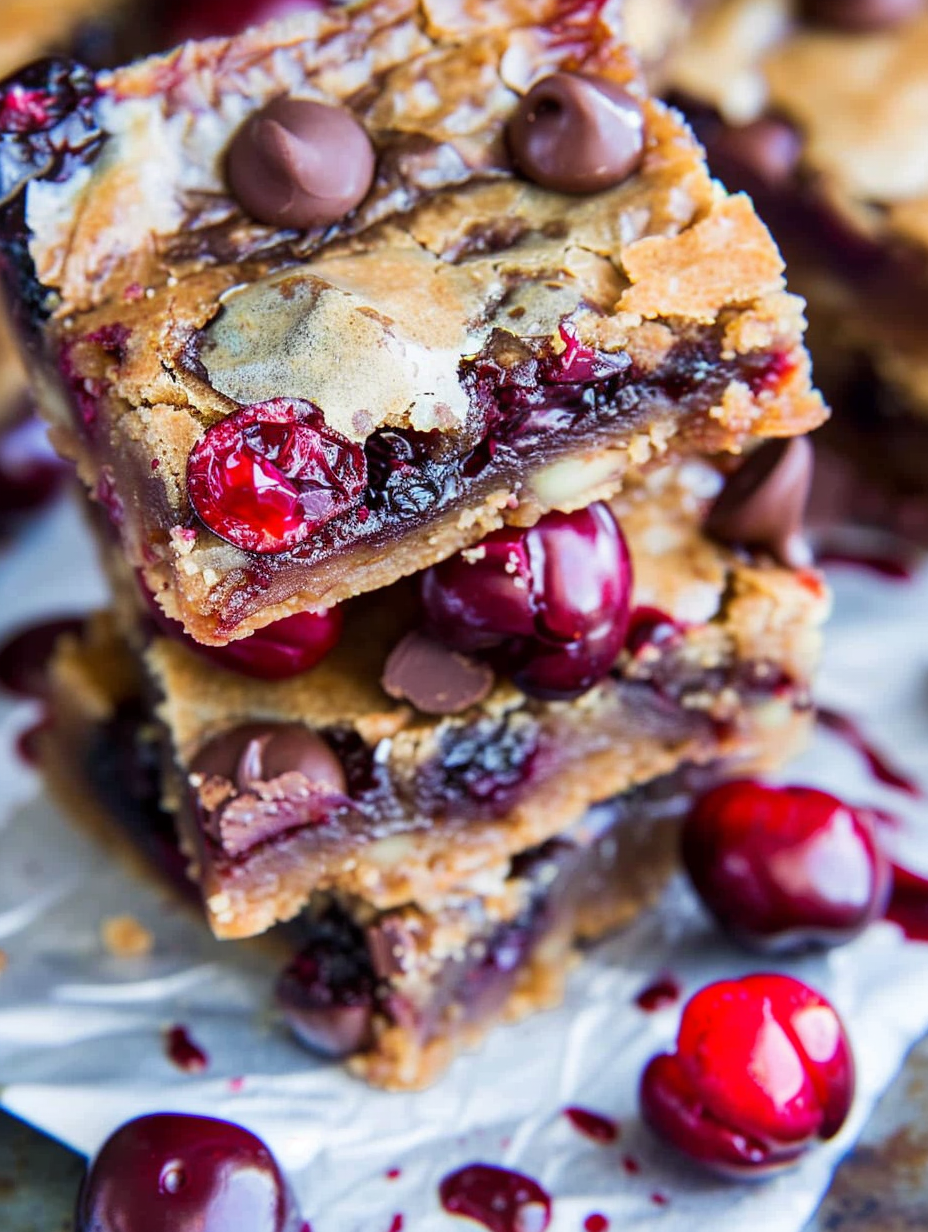
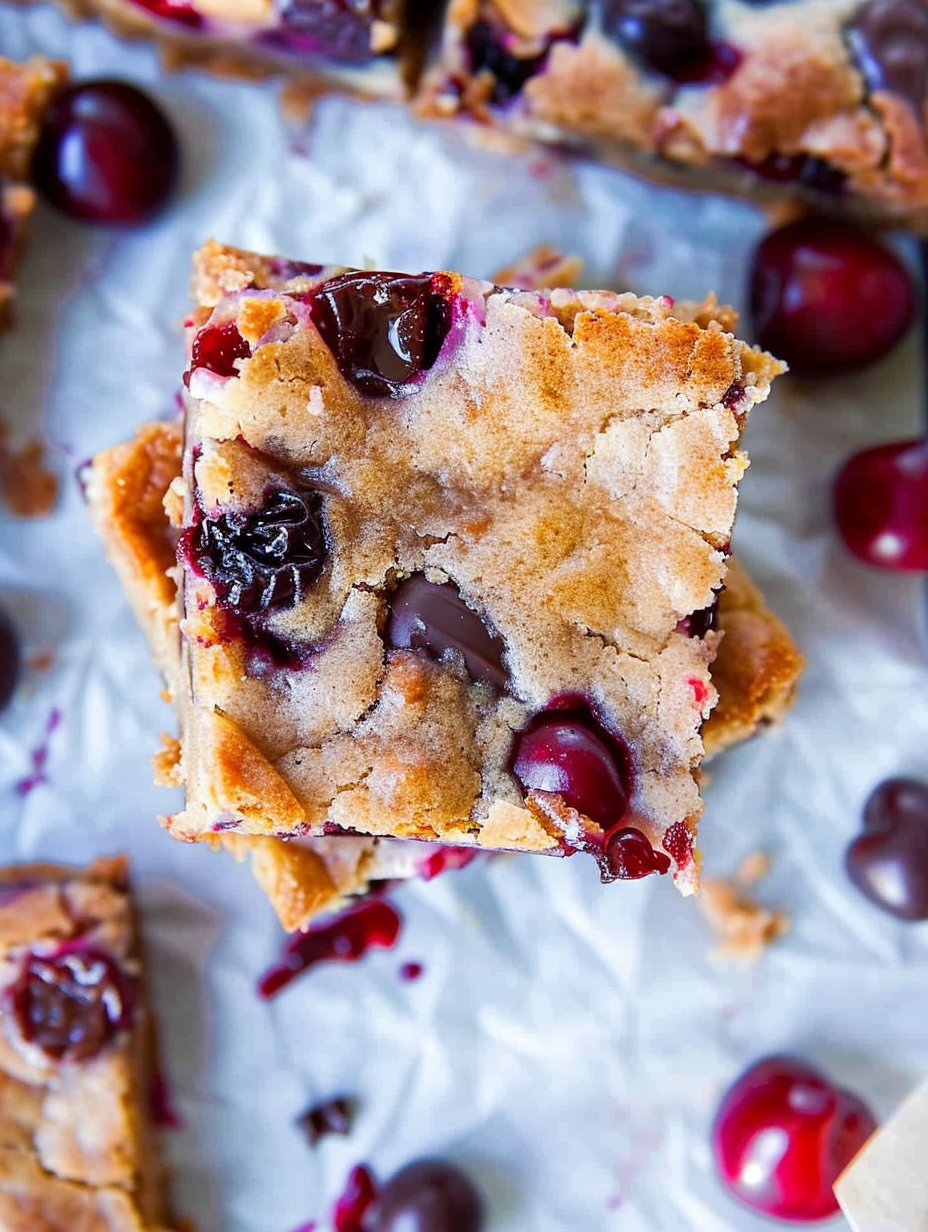
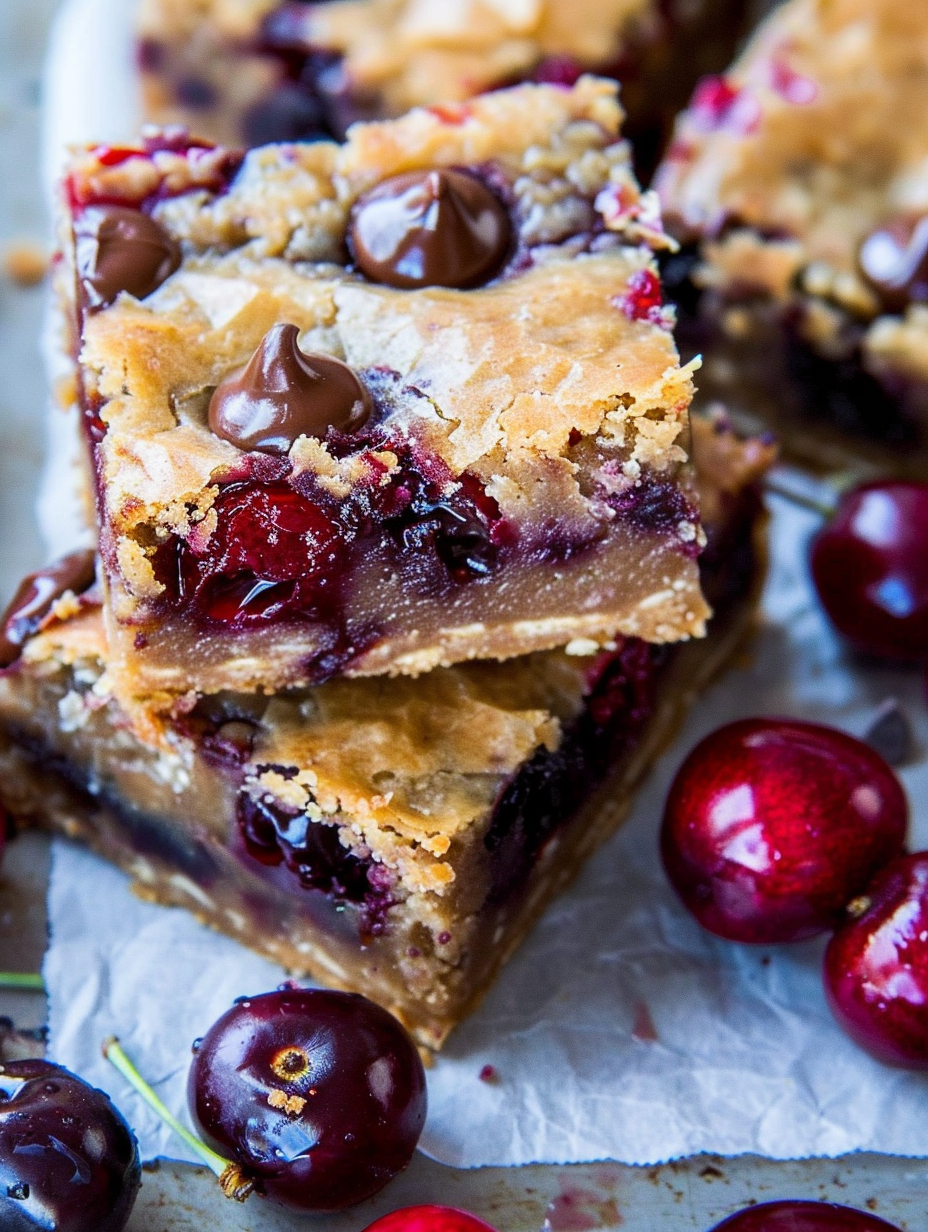
This recipe for Chocolate Chip Cherry Bars uses my favorite blondie base and turns out perfectly every single time. I found this combination on a late summer afternoon when my cherry tree was producing more fruit than anyone could eat fresh. I wanted something that kept the buttery, caramel notes of a blondie but welcomed the bright, tart burst of cherries. The result is a tender, slightly chewy bar with pockets of jammy fruit and melty chocolate — everything I want in a handheld dessert.
What I love most is how reliably the texture holds up: a golden edge with a soft, slightly gooey center when you pull it from the oven, and the cherries add a fresh lift so the bars never feel too sweet. These bars became our picnic staple and an easy offering for potlucks because they travel well, slice cleanly when cooled, and get rave reviews from kids and adults alike.
I still remember bringing a pan to a backyard barbecue and watching neighbors return for thirds. The texture contrast and bright fruit notes made the bars vanish — and ever since, whenever I have extra cherries, this recipe is my go-to. It’s simple enough for weeknights yet pretty enough for company.
My favorite aspect is how forgiving the method is: a small variance in mixing or a heavier hand with the fruit rarely ruins the outcome. The family has a simple test — a true keeper is when the bars are still warm and the chocolate is melty but the center holds together when you pick up a square. That happened every time I made these for summer gatherings, and the feedback was always the same: bright, comforting, and impossible to stop eating.
Store cooled bars in an airtight container at room temperature for up to one week; place a sheet of parchment between layers to prevent sticking. For longer storage, freeze cooled, sliced bars individually wrapped in plastic and then placed in a freezer bag for up to three months. To serve from frozen, thaw at room temperature for about 30 minutes or warm briefly in a 300°F oven for 8 to 10 minutes to revive a just-baked texture. Avoid refrigeration for long-term storage as it can dry the crumb; refrigeration is fine for hot climates or if your kitchen is warm.
If you prefer less sugar, swap half the light brown sugar for granulated sugar and reduce overall sweetness slightly. For a dairy-free version, use dairy-free butter and dairy-free chocolate chips, but expect a slightly different mouthfeel. You can replace all-purpose flour with a 1-to-1 gluten-free flour blend for a gluten-free option; keep an eye on texture as gluten-free flours sometimes yield a more crumbly result. For fruit swaps, plums, peaches, raspberries, or blueberries each bring their own moisture profile — lower-moisture fruits may bake a touch faster.
Serve warm with a scoop of vanilla ice cream and a light dusting of powdered sugar for an indulgent dessert. For brunch or tea, pair with a fresh citrus salad to balance the sweetness. Garnish with a few halved cherries or a drizzle of melted chocolate for presentation. These bars also work well cut into smaller squares as party finger food — arrange on a platter with other bite-sized sweets for a varied dessert table.
Blondies are an American baked good born from the broader family of bar cookies; they share a lineage with brownies but rely on brown sugar rather than cocoa for their flavor. Adding fruit is a home-cooking innovation that nods to classic fruit-studded European cakes and tarts. Combining chocolate and cherry echoes popular pairings like the Black Forest flavor profile, adapted here into a simple, rustic format that highlights seasonal produce.
In summer, use ripe fresh cherries for bright acidity; in winter, frozen cherries or thawed tart cherries work well. For autumn, swap cherries for chopped apples or pears plus a pinch of cinnamon and nutmeg for cozy spice notes. Around the holidays, add chopped toasted pecans and a splash of bourbon to the batter for a festive twist that pairs well with coffee or mulled wine.
Make the batter a day ahead and keep refrigerated in an airtight container; bring to room temperature for 15 minutes before baking to ensure even rise. You can also bake, cool, and slice the bars, then portion into individual containers for grab-and-go snacks. When assembling a week of lunches, pack a single bar with fresh fruit and nuts for a balanced treat. For busy mornings, a quick warm-up in the toaster oven brings back a freshly baked feel.
These bars are comfort in square form: buttery, fruity, and just chocolatey enough. Make them your own by adjusting the sweetness, playing with fruit options, and gifting them to friends — they’re always a welcome present.
Allow the bars to cool completely before slicing to ensure clean, firm squares.
If using frozen fruit, increase bake time by 3 to 5 minutes and check doneness visually.
Use room-temperature egg for a more even batter and better texture.
Line the pan with foil or parchment and leave an overhang for quick removal.
This nourishing chocolate chip cherry bars recipe is sure to be a staple in your kitchen. Enjoy every moist, high protein slice — it is perfect for breakfast or as a wholesome snack any time.
Yes — you can use frozen cherries straight from the freezer. Expect slightly longer bake time and pat excess juice dry with a paper towel if they seem very wet.
These bars can be frozen for up to 3 months. Wrap individual slices in plastic wrap and store in an airtight container or freezer bag.
This Chocolate Chip Cherry Bars recipe makes perfectly juicy, tender, and flavorful steak every time! Serve with potatoes and a side salad for an unforgettable dinner in under 30 minutes.
Preheat oven to 350°F. Line an 8-by-8-inch pan with foil or parchment and spray lightly with cooking spray for easy release.
In a medium microwave-safe bowl, melt 1/2 cup butter about 60 seconds. Stir in 1 cup packed light brown sugar until smooth and glossy.
Whisk in 1 large room-temperature egg and 2 teaspoons vanilla extract until the mixture is uniform and slightly thickened.
Add 1 cup all-purpose flour and optional 1/4 teaspoon salt. Stir gently until just combined; avoid overmixing to prevent toughness.
Fold in 3/4 to 1 cup semi-sweet chocolate chips and 1 cup cherries, distributing evenly so every square has fruit and chocolate.
Spread batter into prepared pan and bake 27 to 32 minutes until edges pull away and center is set. Cool at least 1 hour before slicing into 9 bars.
Last Step: Please leave a rating and comment letting us know how you liked this recipe! This helps our business to thrive and continue providing free, high-quality recipes for you.
Leave a comment & rating below or tag
@silksavor on social media!

Tender baked salmon crowned with a garlicky Parmesan herb crust, bright lemon, and buttery crunch. Simple to make, stunning to serve, and irresistibly flavorful.

Buttery graham crust, silky cheesecake, and cinnamon-kissed apples under a crunchy crumb, finished with glossy caramel. A fall crowd-pleaser you will crave.

Tender green beans in silky mushroom cream, crowned with crispy onions. A comforting holiday side made entirely from scratch that always disappears fast.
Leave a comment & rating below or tag @silksavor on social media!
Enjoyed this recipe? Share it with friends and family, and don't forget to leave a review!
This recipe looks amazing! Can't wait to try it.
Comments are stored locally in your browser. Server comments are displayed alongside your local comments.

Join to receive our email series which contains a round-up of some of our quick and easy family favorite recipes.
