
>>

Crispy wonton shells filled with seasoned beef, Ro-Tel tomatoes and melted cheddar—perfect party bites or an easy weeknight dinner made in a muffin tin.
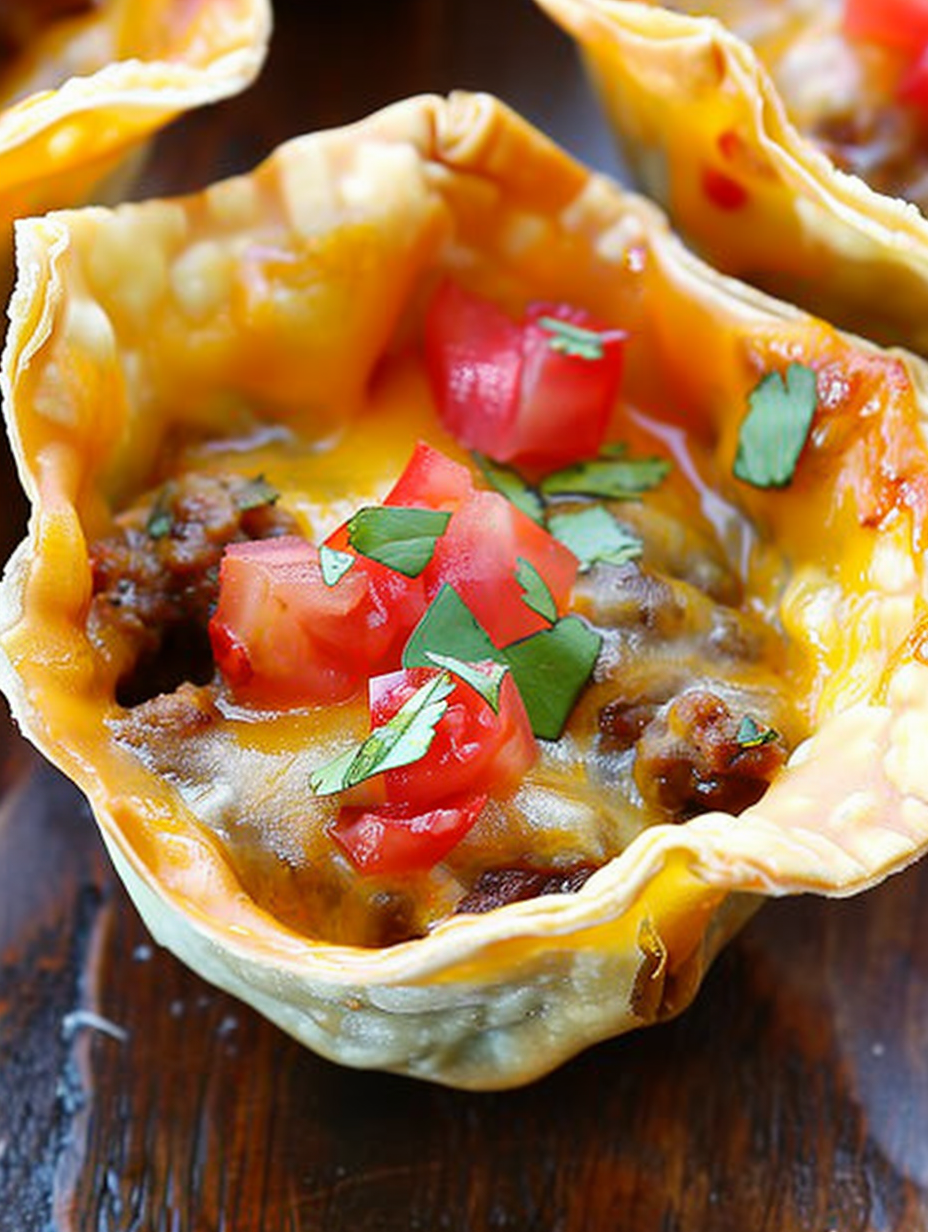
This recipe for Crunchy Taco Cups has been my weeknight and party secret for years. I discovered the idea the first time I wanted tacos but not the tortillas: I happened to have a box of wonton wrappers and a muffin tin on hand, and after experimenting with proportions and layering I landed on a version that gave me crunchy, handheld little cups that everyone loved. The texture is what sells it—an exterior crisp from the wonton edge, tender seasoned beef inside, and a gooey topping of sharp cheddar that pulls apart with every bite. It’s a playful, convenient way to serve everything you love about tacos without the mess of assembling at the table.
I first served these at a casual family gathering on a rainy Saturday evening. My kids immediately compared them to mini tacos and asked for repeats the next week. They’re ideal when you want something familiar but with a fun presentation—great for kid-friendly dinners, buffet-style parties, or when you need easy handheld appetizers for guests. They’re sturdy to pick up, freeze well, and reheat nicely, which makes them a practical addition to any home cook’s repertoire.
When I first refined the layering—meat, cheese, wrapper, meat, cheese—I noticed the cups held together far better and stayed crisp around the edges instead of getting soggy in the center. My family always asks for seconds, and at potlucks these vanish faster than traditional tacos. The recipe is forgiving, so small adjustments in timing or seasoning still yield a reliable, crowd-pleasing result.

My favorite part of making these is how quickly the house fills with that warm, familiar taco scent—and how thrilled everyone gets when they see the little cups lined up on the platter. They work for both casual dinners and as attractive party appetizers, and I’ve lost count of the times guests have asked for the recipe.
Store cooled cups in a single layer in an airtight container in the refrigerator for up to 3 days; separate layers with parchment to prevent sticking. For longer storage, freeze on a tray until firm, then move to a labeled freezer bag for up to 3 months. Reheat refrigerated cups in a 350°F oven for 8–10 minutes; for frozen cups, bake at 375°F for 15–18 minutes until heated through and crisp. Avoid microwaving if you want to retain the crunch, but a quick microwave blast followed by a few minutes under the broiler can work in a pinch.
Swap ground turkey or chicken for beef—use a 1:1 ratio and increase seasoning slightly to compensate for milder flavor. For a vegetarian option, replace the meat with 2 cups of seasoned black beans or a mix of sautéed mushrooms and bell pepper. If you prefer less dairy, reduce the cheese to 1 cup or use a dairy-free shredded blend. Corn tortillas cut into cups can substitute for wonton wrappers; press doubled-up corn rounds into the muffin tin and bake a few minutes longer at 400°F to get crisp edges.
Serve with small bowls of salsa, guacamole, sour cream, and pickled jalapeños for a DIY taco cup bar. For a full meal, pair with Mexican-style rice and a simple cabbage slaw tossed in lime vinaigrette. Garnish with chopped cilantro, a squeeze of fresh lime, and a sprinkle of cotija or extra sharp cheddar. For a casual gathering, arrange on a wooden board with toothpicks for easy grabbing.
The idea of filling crisp shells is rooted in traditional Mexican tacos, but adapting small pastry or dough vessels to create handheld bites is a global concept—think of empanadas or tartlets. Using wonton wrappers reflects a modern kitchen mash-up, taking an Asian pantry staple and applying it to Mexican flavors to produce a fun cross-cultural appetizer. This hybrid approach is common in American home cooking, where convenience and creativity meet familiar tastes.
In summer, fold in grilled corn and chopped fresh tomatoes for a bright topping. In fall and winter, swap the filling for spiced butternut squash and black beans for a seasonal vegetarian twist. For holiday parties, top each cup with a small dollop of cranberry salsa or roasted poblano relish to introduce festive color and an unexpected flavor note.
Prepare the filling up to 3 days ahead and store in the refrigerator. When ready to serve, quickly assemble cups and bake for a fresh, hot appetizer in under 15 minutes. For grab-and-go lunches, assemble, cool, and freeze in single portions; reheat in the oven and pack in an insulated container to retain warmth. Use silicone muffin liners for easy release if you plan to freeze and reheat multiple times.
These Crunchy Taco Cups are a small change with a big impact—familiar flavors presented in a fun, practical format. They invite improvisation, travel well from kitchen to party, and always make a table feel a little more festive. Try them once and you’ll find reasons to return to this easy, satisfying dish again and again.
Keep wonton wrappers covered with a damp towel while assembling to prevent drying out.
Brown and drain the beef well to avoid greasy cups; if using fattier meat, blot excess oil before seasoning.
Use freshly shredded cheddar for better melting and creamier texture compared with pre-shredded blends that contain anti-caking agents.
Press a second wrapper over the first layer to strengthen the cup walls and avoid gaps where filling can escape.
This nourishing crunchy taco cups recipe is sure to be a staple in your kitchen. Enjoy every moist, high protein slice — it is perfect for breakfast or as a wholesome snack any time.
Yes. Assemble and freeze baked cups in a single layer, then transfer to a freezer bag for up to 3 months. Reheat from frozen in a 375°F oven for 15–18 minutes.
Use a light coating of nonstick spray or oil and allow the cups to rest 2–3 minutes in the tin after baking for easier removal.
This Crunchy Taco Cups recipe makes perfectly juicy, tender, and flavorful steak every time! Serve with potatoes and a side salad for an unforgettable dinner in under 30 minutes.
Preheat oven to 375 degrees F and generously coat a standard 12-cup muffin tin with nonstick spray or a thin film of oil to ensure easy release and even browning.
Brown 1 pound lean ground beef in a skillet over medium-high heat, breaking into small pieces; drain excess fat. Return to skillet, add taco seasoning and a small amount of water as instructed on the packet, then fold in the drained 10-ounce can of Ro-Tel diced tomatoes and green chiles.
Line each muffin cup with a wonton wrapper, add 1 1/2 tablespoons of the beef mixture, top with 1 tablespoon shredded cheese, press a second wrapper on top, then add another 1 1/2 tablespoons of filling and finish with 1 tablespoon cheese.
Bake at 375 degrees F for 11–13 minutes until wrappers are golden and cheese is melted. Watch closely at the end to avoid over-browning.
Allow the cups to rest in the tin for 2–3 minutes, then carefully remove and serve warm with desired toppings such as sour cream, salsa, or sliced avocado.
Last Step: Please leave a rating and comment letting us know how you liked this recipe! This helps our business to thrive and continue providing free, high-quality recipes for you.
Leave a comment & rating below or tag
@silksavor on social media!

Tender baked salmon crowned with a garlicky Parmesan herb crust, bright lemon, and buttery crunch. Simple to make, stunning to serve, and irresistibly flavorful.

Buttery graham crust, silky cheesecake, and cinnamon-kissed apples under a crunchy crumb, finished with glossy caramel. A fall crowd-pleaser you will crave.

Tender green beans in silky mushroom cream, crowned with crispy onions. A comforting holiday side made entirely from scratch that always disappears fast.
Leave a comment & rating below or tag @silksavor on social media!
Enjoyed this recipe? Share it with friends and family, and don't forget to leave a review!
This recipe looks amazing! Can't wait to try it.
Comments are stored locally in your browser. Server comments are displayed alongside your local comments.

Join to receive our email series which contains a round-up of some of our quick and easy family favorite recipes.
