
>>

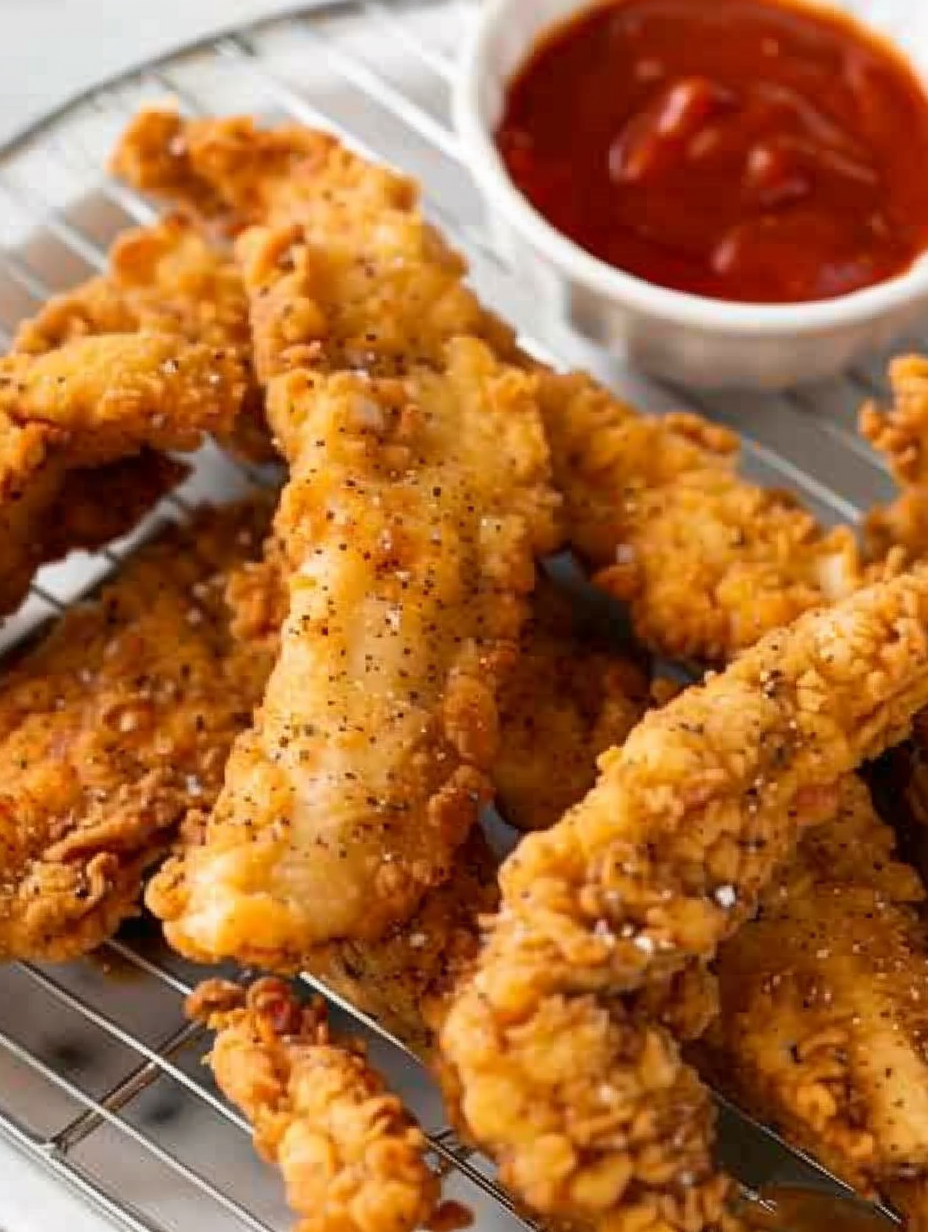
These EXTRA CRISPY fried chicken tenders deliver restaurant-level crunch at home. Learn the chef tricks for perfectly seasoned, crunchy batter every time.
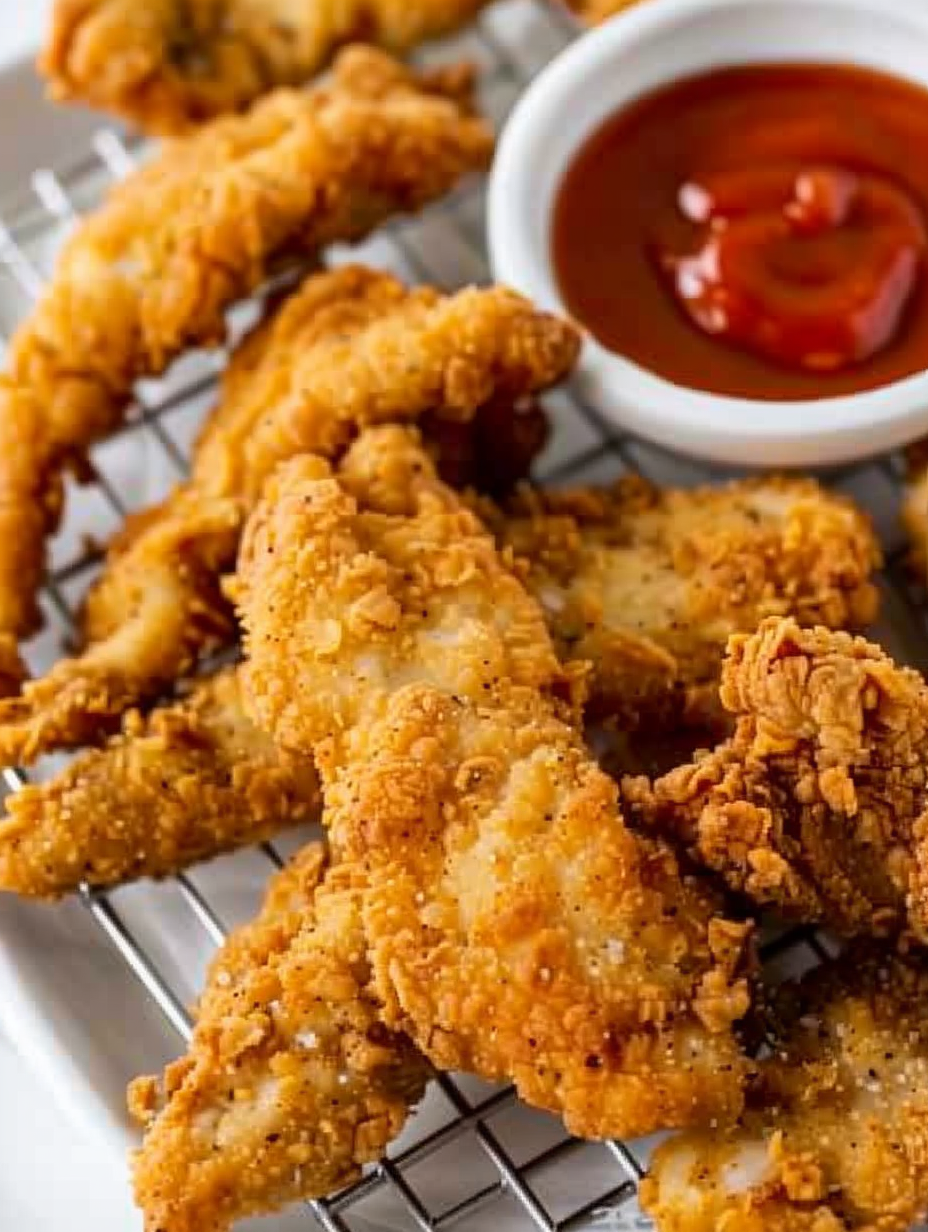
This recipe for Extra Crispy Fried Chicken Tenders became a fast favorite in my kitchen the first time I tested it on a rainy Sunday afternoon. I was chasing the exact crunch of my go-to takeout, but wanted a lighter, well-seasoned coating that stayed crisp under a honey mustard dip. I discovered a few simple techniques—dry brining, using egg whites only, and creating texture with a mallet—that completely changed the game. The result is a tender interior and a crackling, golden exterior that keeps its crunch while staying juicy inside. Family and friends consistently ask for this whenever I host game-day gatherings or casual weeknight dinners.
I first learned the value of pre-salting and drying chicken from a chef friend who insisted it made breading cling better and the inside juicier. Since then I’ve refined the seasoning mix, added a touch of cayenne for warmth, and swapped a portion of flour for breadcrumbs to give a more toothsome crunch. These tenders cook quickly—about 4 minutes per side when fried at the right oil temperature—so you get a restaurant-style result in under an hour from start to finish. Serve them with a bright honey mustard or sticky orange glaze to change the mood of the dish completely.
When I first brought these to a backyard picnic, they vanished—kids loved the crunch and adults kept going back for more because they stayed warm and crisp on cooling racks instead of a paper towel. The salted, rested chicken makes a real difference: even the center stays succulent after frying.

My favorite part of this method is how the mallet and egg-white binder create a crust that crackles audibly when bitten. Once, I made these for a potluck and people swore they were from a restaurant—the difference was the little extra time I spent on texture and temperature control.
Let tenders cool completely on a rack before storing to avoid steam buildup that softens the crust. Refrigerate in a single layer in an airtight container lined with paper towels to absorb any residual oil. For freezing, flash-freeze on a tray until firm, then transfer to a heavy-duty freezer bag to prevent freezer burn. Reheat from frozen in a 400°F oven on a wire rack for 12–18 minutes until crisp and warmed through.
Swap canola oil for peanut or vegetable oil for similar results; avocado oil works if you prefer a higher smoke point. For gluten-free, replace all-purpose flour with 1:1 gluten-free flour and use gluten-free panko breadcrumbs. If you avoid eggs, use a mixture of 1/2 cup plain yogurt and 2 tablespoons water as a binder, though the exterior will be slightly less brittle and more cake-like.
Serve with classic honey mustard, ranch, or a bright citrusy aioli. Pair with coleslaw, seasoned fries, or a crisp salad to balance richness. For a party platter, arrange tenders with small bowls of dipping sauces—buffalo, BBQ, and sweet chili—and garnish with chopped parsley and lemon wedges for a fresh finishing touch.
Fried chicken tenders are descended from broader American Southern fried chicken traditions that emphasize seasoned coatings and hot oil frying. The tender strip is a modern convenience cut that emerged as boneless chicken became more common in grocery stores. Restaurants standardized the tender for its ease of portioning, while home cooks adapted techniques like brining and dual-coating to achieve restaurant-quality crunch.
In summer, serve with a bright peach BBQ glaze or mango salsa for a fresh contrast. In colder months, toss finished tenders in a sticky orange glaze and serve with warm potato wedges. Swap breadcrumbs for panko with herbs in spring to highlight fresh parsley and lemon zest in the coating.
For make-ahead convenience, bread tenders and arrange them on a tray, cover lightly, and refrigerate for up to 24 hours. Fry right before serving for peak crispness. Alternatively, cook and freeze cooked tenders individually; reheat in a hot oven to preserve texture. Use airtight meal prep containers and layer with parchment to maintain crisp edges.
These tenders are comfort food with a thoughtfully engineered crust—easy enough for weeknights, satisfying enough for company. Try the air-fryer option if you want to lighten up, but for full flavor and texture, frying remains unbeatable. Enjoy experimenting with sauces and seasonings to make this recipe your own.
Dry-brine the chicken for up to 4 hours to improve flavor penetration and create a drier surface for better breading adhesion.
Use a thermometer and keep oil between 350–375°F; frying in small batches prevents excessive temperature drop and greasy coating.
Press the breadcrumbs into textured chicken after pounding so the breading fills crevices and forms a thicker crust.
Keep finished tenders on a wire rack, not paper towels, to maintain airflow and preserve crispness.
This nourishing extra crispy fried chicken tenders recipe is sure to be a staple in your kitchen. Enjoy every moist, high protein slice — it is perfect for breakfast or as a wholesome snack any time.
This Extra Crispy Fried Chicken Tenders recipe makes perfectly juicy, tender, and flavorful steak every time! Serve with potatoes and a side salad for an unforgettable dinner in under 30 minutes.
Place wire cooling racks over a baking sheet to catch oil drips. Trim and cut 2 large chicken breasts into 3/4-inch-thick, 5-inch-long tenders and pat completely dry with paper towels.
Lightly season both sides with kosher salt and black pepper. For best results, dry brine uncovered in the fridge for up to 4 hours to dry the surface and let the salt penetrate for juicier meat and better breading adhesion.
Combine 1 cup flour, 1/3 cup breadcrumbs, 1 1/2 teaspoons seasoned salt, 1/2 teaspoon paprika, 1/4 teaspoon cayenne, and 1 teaspoon black pepper. Whisk 3 egg whites until frothy in a separate bowl.
Cover chicken with plastic wrap and gently pound with the rough side of a meat mallet to create tiny crevices. Dip each piece into egg whites, then press into the breading mix ensuring full coverage and that crumbs fill the textured surface.
Fill a Dutch oven no more than halfway with canola oil and heat to 350–375°F. Fry tenders in small batches so temperature recovers quickly, about 4 minutes per side until golden brown. Transfer to racks and keep warm in a 200°F oven if desired.
Verify internal temperature reaches 165°F with an instant-read thermometer. Let rest a few minutes so juices redistribute and the crust firms before serving with dips like honey mustard or ranch.
Last Step: Please leave a rating and comment letting us know how you liked this recipe! This helps our business to thrive and continue providing free, high-quality recipes for you.
Leave a comment & rating below or tag
@silksavor on social media!

Tender baked salmon crowned with a garlicky Parmesan herb crust, bright lemon, and buttery crunch. Simple to make, stunning to serve, and irresistibly flavorful.

Buttery graham crust, silky cheesecake, and cinnamon-kissed apples under a crunchy crumb, finished with glossy caramel. A fall crowd-pleaser you will crave.

Tender green beans in silky mushroom cream, crowned with crispy onions. A comforting holiday side made entirely from scratch that always disappears fast.
Leave a comment & rating below or tag @silksavor on social media!
Enjoyed this recipe? Share it with friends and family, and don't forget to leave a review!
This recipe looks amazing! Can't wait to try it.
Comments are stored locally in your browser. Server comments are displayed alongside your local comments.

Join to receive our email series which contains a round-up of some of our quick and easy family favorite recipes.
