
>>

Crispy pan-seared chicken tossed in a tangy-sweet sesame glaze — a quick, family-friendly dinner that's gluten free and easily made paleo.
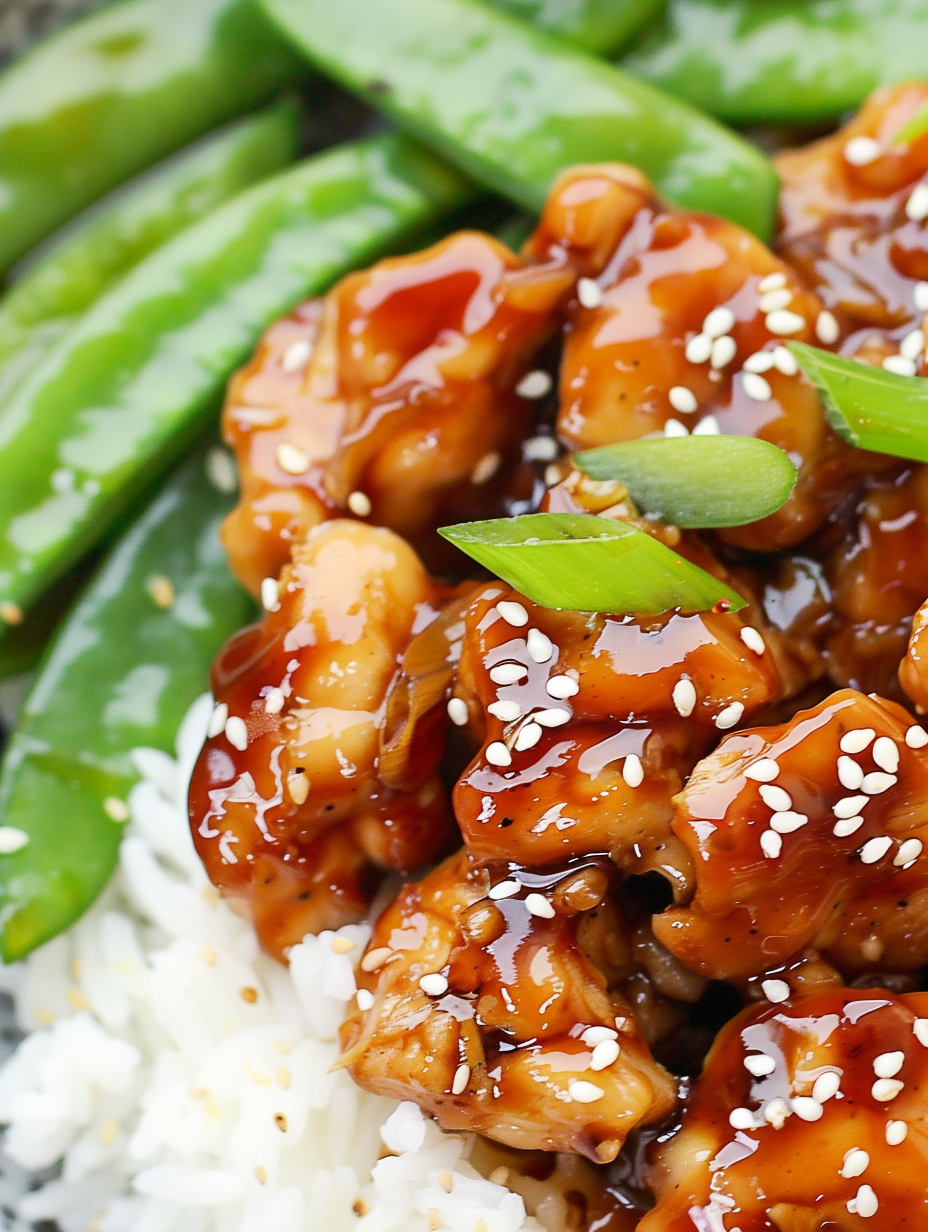
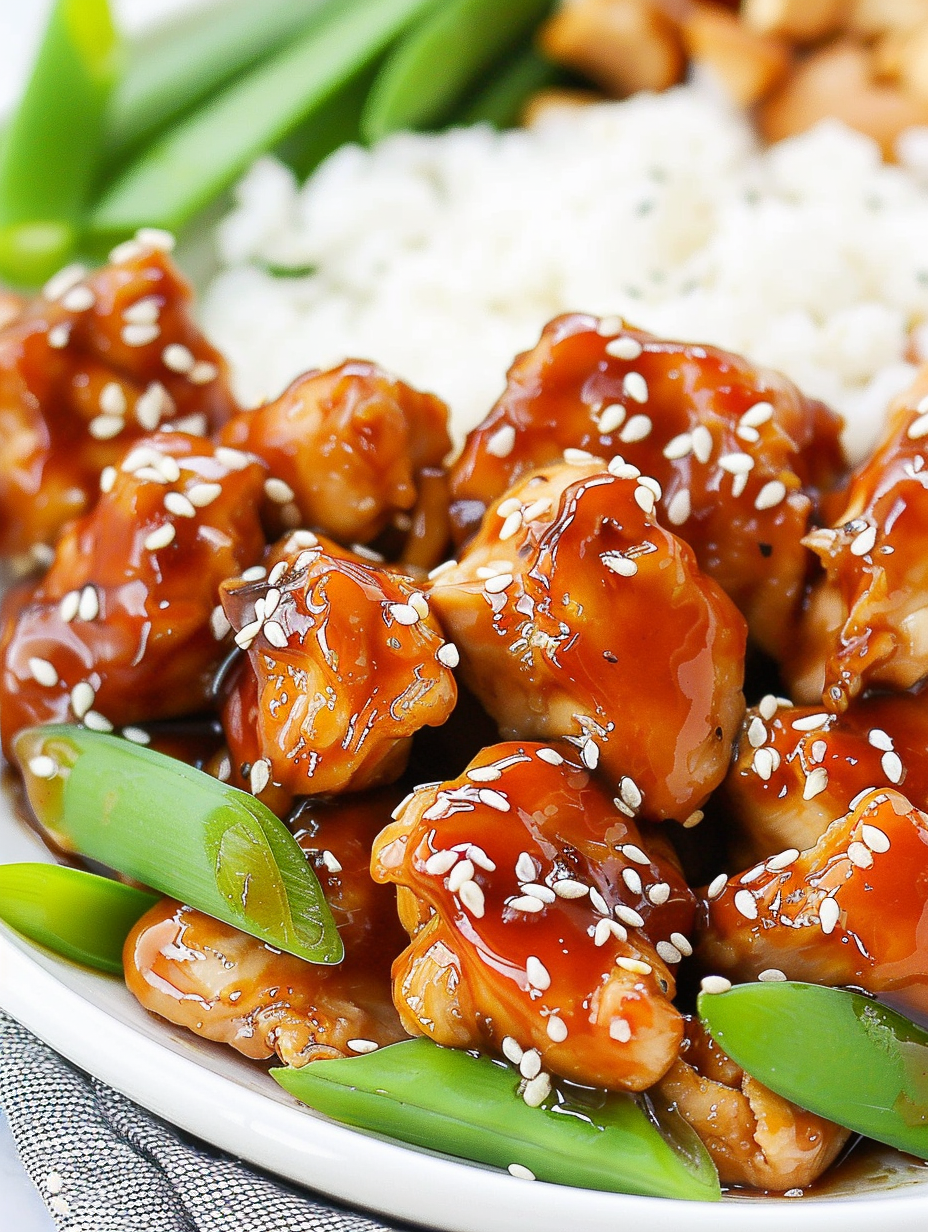
This Healthy Sesame Chicken has been a weekday lifesaver in my house since I first adapted it to be lighter and gluten free. I remember the afternoon I tested it — a busy Tuesday with a fridge of random staples — and the first bite convinced me this would become a repeat dinner. The exterior of each bite develops a lightly crisped coating from a quick cornstarch toss, while the sauce balances salty, sweet, and umami notes with a whisper of toasted sesame oil. It’s bright from rice vinegar and garlicky with a warming touch of ginger, finishing with sesame seeds for texture.
I often make this when I want something comforting but not heavy. It’s flexible: use chicken breasts for lean protein or thighs for juicier bites. The sauce clings beautifully to the chicken and, because it’s thickened with a cornstarch slurry (or arrowroot for paleo), it coats without becoming a gloopy mess. Family members always ask for more rice to soak up the sauce, and I love how fast it comes together — 10 minutes prep and about 20 minutes on the stove.
On my first run, I omitted the red pepper flakes for the kids and added a bright squeeze of lime at the table. The contrast of crisped chicken with the glossy sesame glaze made everyone pause before digging in; my partner declared it “restaurant-level” for a home dinner. Over time I learned to adjust salt and sweetness to taste, and now it’s one of the most requested dinners in our rotation.
What I love most is how forgiving this method is: small changes to sweet or salty components are easy to correct while the sauce is warm. My teenage son once doubled the maple syrup by accident and I rescued it with extra tamari and a splash more vinegar — we all ate it anyway and laughed about it. It’s a flexible, user-friendly evening meal.

Store leftovers in an airtight container in the refrigerator for 3–4 days. Because the sauce contains starch, it will firm up when chilled; reheat gently in a skillet over low heat and add a tablespoon or two of water to loosen the sauce to your preferred consistency. For longer storage, freeze cooked chicken and sauce in a freezer-safe container for up to 3 months. Thaw overnight in the refrigerator before reheating to preserve texture. Use microwave-safe containers for single portions and cover loosely when reheating to avoid splatter.
If you prefer a soy-free version, substitute coconut aminos in a 1:1 ratio for tamari; the dish will be slightly less salty and a touch sweeter. For paleo compliance replace cornstarch with arrowroot in the same quantity and make the slurry with cool water. Swap maple syrup for honey if you like a more floral sweetness. If you want extra crunch, lightly toss cooked chicken with toasted almonds or sliced cashews before serving. For a lower-sodium option, use low-sodium tamari and reduce added syrup by 1 teaspoon.
Serve over steamed jasmine rice, cauliflower rice for a low-carb option, or a bed of mixed greens for a lighter meal. Add steamed broccoli, snap peas, or thinly sliced bell peppers for color and crunch. Garnish with sliced scallions and a drizzle of extra toasted sesame oil at the table. For family-style dinners, place the chicken in a shallow bowl and offer lime wedges, chili oil, and extra sesame seeds on the side so each person can customize.
This version of sesame chicken is inspired by Chinese-American flavors popularized in home kitchens and restaurants. While classic restaurant preparations rely on deep-frying, this lighter stovetop technique keeps the essence — sweet-salty glaze and toasted sesame — while trimming fat. Sesame oil and tamari bring the essential umami and toasted aroma; rice vinegar provides balance. Adapting techniques for modern diets like gluten free or paleo highlights how traditional flavors can be preserved with simple swaps.
In spring, brighten the dish with snap peas and thinly sliced radishes for peppery crunch. Summer calls for fresh herbs — cilantro and basil work surprisingly well — and quick-blistered shishito peppers. In autumn swap maple syrup for a touch of apple butter for a deeper seasonal sweetness. In winter, fold in roasted root vegetables or serve over warm farro for a heartier meal. Adjust the sauce sweetness down in summer when produce is naturally sweeter.
For efficient meal prep, cook and cool the chicken and store the sauce separately in mason jars. Reheat both together in a skillet for 3–4 minutes with a splash of water to loosen the sauce. Portion into meal prep containers with steamed rice and vegetables for grab-and-go lunches. Use vacuum-sealed or airtight freezer bags for longer storage and freeze flat to save space. Label containers with date and reheating instructions for quick reference.
Final note: this recipe blends convenience with thoughtful technique. A simple cornstarch coat and a quick stovetop glaze deliver bright, comforting results that fit busy lives. Make it your own by adjusting sweetness and heat, and enjoy the way a few pantry staples can create a memorable weeknight meal.
Pat the chicken pieces dry before tossing with starch for a better crisp during searing.
Cook chicken in a single layer and in batches to avoid steaming and to achieve even browning.
Taste the sauce before thickening — it concentrates as it heats so adjust salt or sweetness early.
Use low-sodium tamari or coconut aminos to control sodium; you can always add more later.
If the sauce is too thick, thin with a splash of warm water while reheating.
This nourishing healthy sesame chicken (gluten free + paleo friendly) recipe is sure to be a staple in your kitchen. Enjoy every moist, high protein slice — it is perfect for breakfast or as a wholesome snack any time.
Yes. Use arrowroot powder instead of cornstarch and coconut aminos instead of tamari to make the recipe paleo and soy-free.
Reheat gently in a skillet and add a tablespoon or two of water to loosen the sauce. It often firms up in the fridge due to the starch.
This Healthy Sesame Chicken (Gluten Free + Paleo Friendly) recipe makes perfectly juicy, tender, and flavorful steak every time! Serve with potatoes and a side salad for an unforgettable dinner in under 30 minutes.
Combine diced chicken with cornstarch or arrowroot and tamari in a bowl. Toss until evenly coated to promote a light crust when searing.
Warm a large skillet over medium-high heat and add avocado oil. Ensure pan is hot to encourage browning without steaming the chicken.
Cook chicken in a single layer without crowding, 3–4 minutes on the first side and 1–3 minutes on the second until opaque. Transfer cooked pieces to a plate and repeat.
Whisk water, tamari or coconut aminos, maple syrup or honey, rice vinegar, sesame oil, garlic, ginger, and red pepper flakes in a liquid measuring cup.
Whisk cornstarch or arrowroot with water to form a slurry. Reduce heat and stir slurry into sauce, then pour into the warm skillet and whisk until glossy and thickened, about 3–5 minutes.
Return chicken to the pan, toss to coat and heat through. Sprinkle with sesame seeds and serve hot. Store leftovers in an airtight container for 3–4 days.
Last Step: Please leave a rating and comment letting us know how you liked this recipe! This helps our business to thrive and continue providing free, high-quality recipes for you.
Leave a comment & rating below or tag
@silksavor on social media!

Tender baked salmon crowned with a garlicky Parmesan herb crust, bright lemon, and buttery crunch. Simple to make, stunning to serve, and irresistibly flavorful.

Buttery graham crust, silky cheesecake, and cinnamon-kissed apples under a crunchy crumb, finished with glossy caramel. A fall crowd-pleaser you will crave.

Tender green beans in silky mushroom cream, crowned with crispy onions. A comforting holiday side made entirely from scratch that always disappears fast.
Leave a comment & rating below or tag @silksavor on social media!
Enjoyed this recipe? Share it with friends and family, and don't forget to leave a review!
This recipe looks amazing! Can't wait to try it.
Comments are stored locally in your browser. Server comments are displayed alongside your local comments.

Join to receive our email series which contains a round-up of some of our quick and easy family favorite recipes.
